Showing posts with label Fyber Cafe. Show all posts

Tuesday, March 19, 2019

Gel Print Class

On Thursday I taught a Gelatin Monoprinting class, for several ladies from my Fyber Café art group. I hauled in a whole lot of supplies, stencils, masks, found objects, feathers, twine, potato mashers, combs, as well as paint, fabric and paper. Most of us wanted to print on fabric, but we did do some paper too. Fabric takes a little bit thicker application of paint, to adjust for the weave showing through. We played and played all day. Spring was three weeks late for us, as we had a late snowfall at the end of February, so there was very little greenery to pick. Ferns and heavenly bamboo are green all year around here, I had put some ginkgo leaves in the freezer last fall and they worked great. A friend gave me a hand full of peacock feathers, what fun! One lady got fixated on a spirograph type stencil, another with the turkey feathers. Each had a favorite style, and I encouraged them to make coordinating prints, in different colorways, so they can collage an art quilt from them. The photos are a few from each lady, but I am sure I've got the identities mixed up on some prints. Crystal had a variety of stencils, and the last print is on an "ugly" hand dyed fabric. Lorraine loved the feathers, and she made a few prints with an opaque yellow on black. Meredith used a lot of botanicals, a tangle of eyelash yarn, and stencils. Stephanie's spirographs in many bright colors, she made many more. Tracy used feathers and a favorite stencil. The last print is the stencil and it's ghost print on the same page, isn't it fabulous! I made some prints to use as the demonstration, but I did not get any pics, I'm sure some of them will show up in a future project. I will be linking this to Nina Marie's "Off the Wall Friday" click here to see what other fantastic textile artists are doing this week.

Friday, December 4, 2015

She Flies With Her Own Wings

"She Flies With Her Own Wings" is the challenge theme for our Fyber Cafe textile arts group. It is the Oregon State Motto. My cousin's granddaughter loves her pet chickens, and I thought she would want to fly with them if she could. So I asked her mother to take a few photos of her with her hands out to the side, sitting on the lawn. I'm going to put feathers in her hands and chickens in the background.
I enlarged the photo and traced it onto clear plastic to make a pattern. In Photoshop I printed it in poster mode to get a 2 x 2 sheet for a pattern. With cropping, it comes out to 18" x 24" when I add extra width for the feathers. I worked on the flesh tones first, I have an assortment of 8 x 10 fabric gradations, in pink to beige to tan brown hand dyes. I picked them up at a quilt show just to do faces with. I've added a few pieces of Kona cotton and others to give me a wider range. Next I want to try dyeing my own fabrics for this purpose, I love to do portraits. I used a clear plastic outline of the face to get the positioning just right. With this type of pattern I use the fusible instead of raw edge applique, because I need exact shapes. Wonder Under fusible interfacing gives me sharp outlines with little raveling.
Working on the blouse and skirt next, I followed the colors in the photo. The left side shadow will be changed, that fabric has too much contrast. Making the skirt I used some vintage fabric hexagons, so I folded the one edge and overlapped it with the first piece of fabric, to look like folds in the skirt. Instead of looking like my fabric pieces were too small.
I hope the black lace gives the folded skirt more dimension too. I had enough to put along the bottom edge also. A 1/8" pink satin ribbon will be embroidered at the gather point of the blouse and tiny buttons added. The grass is beginning to come together. I have collected landscape prints for quiet some time, so I had a variety of grasses in several sizes to give depth to the picture. I still need to find some cute chicken pictures to make a pattern from, to put in the background.
I had two fabrics, a gray and black colorway of feathers, I cut them out and made them shorter and narrower, and I also want to get some real feathers to embellish with. Thread painting will help the fabric ones look more real. So I am making progress, the deadline was November, but it really just needs to be ready for the Guild quilt show in April. Hopefully I'll have more to show you next Friday.

I am linking this to Nina-Marie's "Off the Wall Friday" to click on the badge in the right hand column and see what other wonderful textile artists are doing this week.

Saturday, November 17, 2012

5000th View

Thank you everyone who looks at my blog. Over two and a half years, I've had 5000 visitors, and made 150 posts. I try to make it interesting, not only showing you my finished projects, but also some of the techniques, hints and helpful tips on creating them. The most viewed post was "How to Thread Paint a Dragonfly" my step by step photos were detailed, and appreciated by everyone I talked to. My art quilting has been growing in complexity, vision and color, and my newest piece will be posted soon. I am happy with it, as it is totally abstract, my comfort zone is pictorial, and all the feedback is great. I can't wait to show you the finished piece. I have 650 listings in my quilt records, about 100 of them unfinished projects, but I keep track of them all, so I can stay on track. Some of the listings are pillows, purses, postcards, journal pages, place mats, and various other quilted items, not many large quilts. I don't let anything leave the house without a photo. I have been quilting since 1973, when I took a textile class in high school and then made a hand sewn and quilted twin quilt for the final project.

My First Quilt, "Orange Julius"

Since moving to Roseburg, 21 years ago, I took quilting seriously, joined the Umpqua Valley Quilters' Guild, and became the President for two years, after doing all the other jobs first. I became interested in art quilting early on, as I loved applique and liked to design my own flower patterns. I taught classes for many years, mostly beginning quilting, but then taught more advanced classes as well. I joined Fyber Cafe, a textile arts group, when it was being formed, and have made many more wonderful friends. I am blog master for them too, at Fybercafe.blogspot.com Now my focus is on art quilting, embellishing, fabric painting, Photoshop & printing my photos on fabric and using them in my quilts. I love applique, but arthritis is doing it's thing with my hands, and I can't hand sew or bead much any more. It's a good thing I can machine quilt and machine applique so well, but I still think I need more beads on some of my work. So thank you for looking at my writing, my photos and my quilts, I'll try to keep it interesting as we move along to the next 10,000 page views.

Saturday, October 20, 2012

Making Leaves

Several of our Fyber Cafe ladies attended a leaf making workshop for Sherry and Kay. Sherry's fiber group in Ketchican, Alaska has a grant to make a 17 foot fiber tree in the children's section of the new public library. They need thousands of leaves, so we spent the day painting and stamping on paper and layering with a stem and fabric backing.


They still need to be trimmed and coated with gloss medium, Sherry had samples of finished leaves for us to admire. We had a wonderful lunch and it was fun to make a mess with paints and help a wonderful cause.

Saturday, October 13, 2012

The White Album

As we are getting ready to put our Beatles Challenge pieces in the Sutherlin Library, an idea popped into my head. To stitch white on white, a picture of the four Beatles, and call it the white album. My supervisor at work, is a big Beatles fan and had several posters and pictures in her office. So I borrowed one that is a black and white silhouette style, traced it onto tracing paper and then onto white fabric. I used a red, heat disappearing pen to draw the pic, and free motion machine quilted it. I added lyrics and song titles around each head to add texture and fill in areas. It looked really strange with the red markings, and I was worried they would not come off. I wish I had taken a picture with the ink still on it. A quick hit with the hot iron and it instantly disappeared!! WOW, Magic!! I got the binding on and finished the sleeve, and had the whole thing finished in about 1 1/2 hours. The black and white picture is really good contrast and you can see how it really looks like them, not so much the outline only. It was difficult to photograph the white on white, I set it on my ironing board and put a small lamp, low so it was table level, casting as much shadow as possible. I had to lighten/whiten it up in photoshop cause it looked all creamy colored, like dark muslin.


We got quiet a few more pieces done for the challenge, so it will make a nice display at the library.

Sunday, September 2, 2012

More Ice Dyeing

Several ladies from Fyber Cafe came over to do some more ice dyeing, as they missed the workshop. We did silk scarves and a shawl, silk yarn, cotton muslin, and almost a kitten.


The pinks are all mine, I put a bunch of scraps together in one basket, so they came out similar, I used fuchsia, red, and burgundy dye. My cheesecloth came out peach, and I got one muslin with bronze dye, that came out a rich salmon color. I tried some silk hankies, in plastic strawberry baskets, but now I don't know what to do with them. They are not handkerchiefs they are layers of silk fiber for spinning. For more info see Fybercafe.blogspot.com there are more photos posted.

Sunday, August 5, 2012

Dye Workshop

What a wonderful weekend, dying fabric and trying to marble fabric. 10 of our artists from "Fyber Cafe" got together and had a dye workshop, this is our 5th annual event. The ice dyeing on the silk scarves worked out beautifully, we all made several scarves and some even dyed yardage. See more details on Fybercafe.blogspot.com It was a hot weekend, 93 on Friday, 104 on Saturday, yikes! We were outside most of Friday, and thankfully her studio had air conditioning. For details of the ice dyeing see previous post here also.


In the afternoon, we did prep work for marbling on Saturday, soaked the fabric in alum, and hung it up to dry. Prepared the goop that is used to float the paint and make the patterns on. Unfortunately we had trouble making the paints the right consistency, for the marbling, and got rather frustrated. A few of us are going to try again on Wednesday at my house.


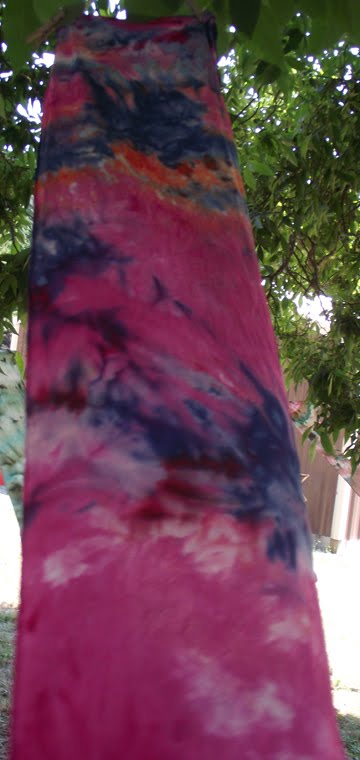
We did have a great time, opening our scarves after we left them to sit over night. We hung them on a tree and they flapped in the wind and glowed in the sun. The potluck was tasty as always, lots of goodies, including apple crisp and chocolate zucchini bread.

Thursday, August 2, 2012

Ice Dye Results

The ice dyeing from yesterday, turned out very interesting. The blue/turquoise/black did not hold it's color very well in the washing. I don't know if this is because the dye was old, or it just looked so much darker wet, so that I did not use enough powder. The red/raspberry/orange came out very vibrant and colorful, with the blue added the purple was very bright. The only problem I had was with the golden yellow, it caked and clumped up and did not want to dissolve. I mixed it around a bit with a rock and it did bleed in and dyed very intense, but did not spread very far. So judge for yourself the colors and patterns. The pictures of the fabric are pretty good representations.


Some were fat quarters, some were half yards, I went to the larger pieces cause it was hard to pile the ice on the smaller ones. But it did not make any difference, once it was folded and scrunched up, they were both small piles of fabric. I've seen in the magazines and blogs, that some people put the ice in a large jar or bucket, this ends up all melting together and sitting in the dye, like a "parfait dye" process. I think on the wire shelves, it made the dye and ice seep through the fabric, and the muslin wasn't sitting in a puddle. I have two wire baskets, I'm going to try also.


The results look very similar to tie dyeing also. I folded into triangles a few pieces, accordion folded some and scrunched up others. I like the patterning, and will try mixing more colors next time. Using the dry dye powder was simpler than having to mix up all the jars of solution, but I think it used a lot of powder. I dyed 4 yards of fabric, but I think the dye would have done more fabric if made into concentrates, and immersion dyed. I feel it was a good use of old dyes, but if I just spent a lot of money on dye, it might be a waste. I hope you enjoy following the process with me. I get to do it all over again tomorrow at our two day dye workshop, but we are doing silk scarves. I think the colors will come out scrumptious!