I haven't been sewing for about 3 weeks, getting ready for the quilt show took a lot of work. See The Fyber Cafe blog for the Umpqua Valley Quilt Show, and the display of textile art our group put together. Family visiting for Easter, and my husband being ill, also took quiet a bit of my attention. I got a new tablet while our tech savvy family was visiting, they helped me pick one out and get it set up. So I decided to make a case for it. This is the whole view, of it folded open, it folds in half, with a pocket inside to hold the tablet. I used a Gelli print, that I made, but did not like, so I kept printing over it with more layers until I liked it. It has deep red undertones, with metallic blues printed on with some plastic needlepoint mesh in a circle. I pieced it with a red/purple Bali batik, to make the fabric large enough. I couched some yarns around two of the circles, then used a blanket stitch in lighter blue around the remaining circles. It has a full length Velcro closure on one side, and an elastic loop to hold the stylus. I used an extra stiff/extra thick interfacing with the top layer, and also a cotton batting with the lining for softness/padding. The inside, with the tablet in a bottom pocket, with stylus at top. Then of course I decided I need to bead it, so I added some circular star bursts with seed and bugle beads. I will add more beads as I get time, and my hand doesn't hurt. It is a little tight, as the fabric shrunk when I free motion quilted it, but it is ok for a first effort.
I am linking this to Nina-Marie's"Off the Wall Friday" click on the badge in the right hand column to see what exciting things other textile artists are doing.
Art quilting, tips, techniques, thoughts and creativity. Textiles, antique quilts, fabric dyeing, fibers.
Showing posts with label Gelli Print. Show all posts
Saturday, April 26, 2014
Thursday, December 19, 2013
Teal Dragonfly
I haven't officially named this one yet. It's just the one I used teal paint on, some thing clever will show up in my brain when I least expect it. The same as the other botanical Gelli plate prints, masked with my hand cut stencils, then over stenciled with more acrylic paint, sequin waste and other texture tools. Free motion quilted in rayon threads, to outline and vein the leaves, a small stipple in the background. This one has some extra muslin along the sides when I printed it, so I added the stencils around it. It made it different then the 8 x 10's I have been printing with the Gelli plate. The top edge was ragged so I went with the arch to include a little of the muslin at the top also.I am linking this with Nina-Marie's "Off the Wall Friday," click on the badge on the right hand column to see some other wonderful fiber artists.
Friday, November 8, 2013
Misty Morning Mauve
Another botanical Gelli Plate print, has been finished into a small wall hanging. I added layers of paint with stencils, sequin waste, and raw edge applique. The border fabric was one piece that graduated from pink to dark burgundy, when it was cut in squares, and rearranged it made a nice blended combination of fabrics. I really like the wispy, calm feel to these prints, they are very delicate. The addition of thread painted dragonflies, gives them a focus. See previous posts on the painting, printing & stencils for this technique. I've posted this on Nina Marie's Off The Wall Friday Click Here to Check out all these wonderfully creative people!
Saturday, November 2, 2013
Slightly Breezy
The full title of this piece is "Slightly Breezy with a Chance of Dragonflies." I made it from two 8" x 10" Gelli plate prints, sewn side by side. It is over printed with stencils in darker green and detailed with sequin waste, and a hexagon print, also metallic gold paint. I have added three 3-D thread painted dragonflies, with loose wings, only the bodies sewn down. It is for the new Fyber Cafe challenge, "Weather Report."I did not do any quilting in the background, as I would usually do, this left the stems and other details to show up better. The border is a Bali batik. I can't wait to quilt the other layered botanical prints that I made.
Saturday, October 26, 2013
Layered Botanical Prints
Several more of the botanical Gelli Plate prints have been layered with stencils and acrylic paint. These 3 have a darker color paint for the stencil, but when I add background detail I tried to add a white and a dark. Then I added just a bit of another color for an accent. The sequin waste, I paint with a very dry stiff brush, for subtle color. I made a piece of template plastic, with one hole punch, so I can place a single small dot precisely placed. I also have a favorite tool, a silicon hot pad with a hexagon pattern on it, very flexible and rubbery, it makes great delicate texture. I just brush on a small bit of paint, and print with it. A close up of the light teal print. It has several subtle shades, and textures.
The blue print on the left, has the same blue, painted stencils, as the ghost print on the right. My Ultramarine blue faded to turquoise with the addition of white, I also used a silver metallic paint on the two blue prints. I also cut a small dragonfly stencil about 1" across. Now I can't wait to free motion quilt them, and thread paint some 3-D dragonflies! How to thread paint a dragonfly
Friday, October 25, 2013
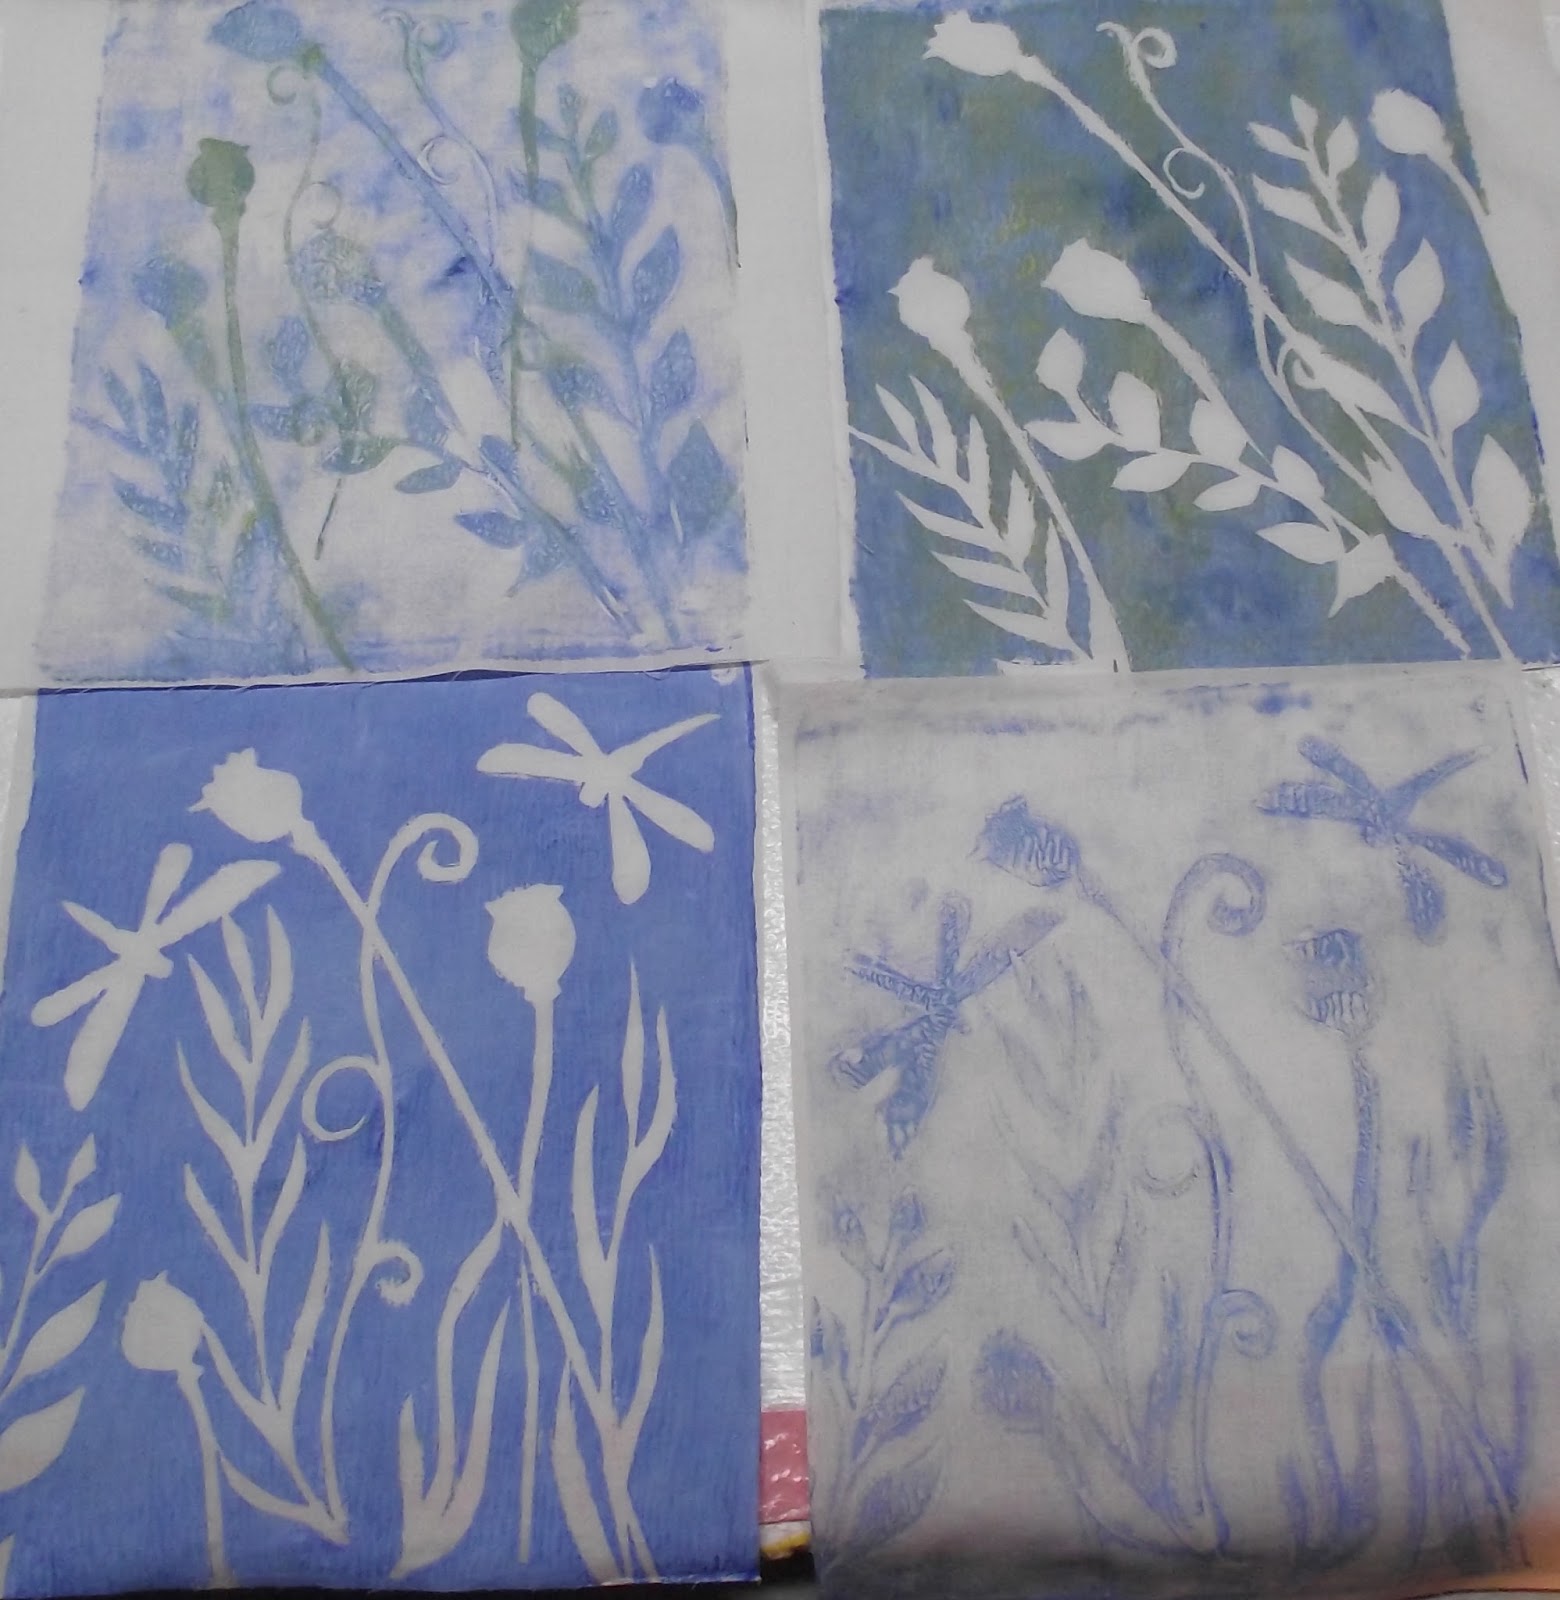
Botanical Gelli Prints
I cut a few more stencil/masks, some smaller leaves and some dragonflies. This is an arrangement of several stems together, with the dragonflies. I have posted this on Nina Marie's Off the Wall Friday please check out these other wonderful textile artists. The first photo is a finished Gelli print, after I have added printing and stencils to it. The 2nd pic is how the Gelli print first turned out. I used several masks over a mauve paint, then laid down the fabric, it turned out very crisp and clear, but it needed more layers. I stenciled a darker mauve with a poppy pod, and extra foliage, the stencils worked well and the X-ray plastic was easy to wash the paint off of. I used several shades of paint a white pink and a darker one, with a sequin waste for a stencil, it added a lot of texture to the background, and some highlights to the pods and leaves. I think all my Gelli prints I made yesterday will get this multiple layer treatment. These are the original prints, just using the masks. I made several different colorways, I used large jars of Versatex Textile paints, to see if I got a different feel than the cheap $1 acrylic bottles. I also added a colorless extender, hoping for more transparency, I think it helped a bit, it's not as opaque/chalky as the cheaper paints, but it covered well. I think you can see the quality of the paints best, on the ghost prints. There was plenty of paint to get a good print, and transparent enough when I added a 2nd print, to show through. You can compare the ghost and the original side by side. After making the ghost print, I also used the peeled off masks to make a print onto a clean piece of fabric. I think I like these the best, I can't wait to add more layers to them, but I've never liked how the white/muslin background looks. I may add a light wash of paint to the backgrounds. So I am very happy how these turned out, especially the layered mauve one, now to play with the others.THIS IS ALSO MY 200TH POST! Thank you everyone for following.
Saturday, September 14, 2013
Expressive Words on Gelli
I got my Gelli Plate and acrylic paints out to play! What fun, to try my new sets of foam words, I spilled them all out on a table and picked out a few word combos. I added some textile medium to my paints, this time, to try to get a softer feel to the fabric, and some transparency. It did not make much difference in either, but it did keep the paint from drying too fast and gave me time to add texture. A similar range of colors added continuity, to make a set of fabrics I can use together in a project. Two layers of Gelli prints, with the lettering, followed by rubber stamps, then textural and sequin waste printing, created a multi layered fabric with lots of depth. I am still not happy with the chalky opaque look of the cheap paints. I think I will have to buy better paints, I'm going to try damp fabric next time, for a more subtle look. The lettering did not come out very distinct. Maybe darker paints next time for more contrast? I used white and colored pencils to add contrast and accent the letters. I also stamped TRY and the letter E in hope, cause I covered it up with the printing, oops. It was lots of fun, and I want to try more, this was just a quick few minutes to get out my paints and play.
Sunday, January 27, 2013
Apricot Moons
A small, 8" x 10" journal page, made from a "gelli" plate mono print. In pale yellow/gold under printing, and masked with 3 round circles, and printed with a coral/peach acrylic paint. Raw edge applique with 2 branches in rust batik, and green leaves. Embellished with 2 folded flower buds and two 4-bud petaled flowers. Beaded in the center of the flowers and around the largest moon. A thread painted dragonfly is in the top left corner, with loose wings.
Sunday, May 13, 2012
Birch Trees
I mono-printed on the gelli plate, a set of Birch trees, with a new stencil that I got at the Portland show. Peggy and I decided that working in a series was a good way to go with the printing. We could try different aspects of the printing process by varying the techniques. The trees were printed in Black and purple acrylics, and a ghost print was pulled from each. The set blended together in a row, to create a horizontal scene. I added "snippets" to the top for tree foliage, and cut out leaves and ferns to the bottom. My husband Charlie suggested a bird to add a focal point and movement, a second bird helped even more to bring your eye across the horizontal piece. I can't wait to quilt the birch trees in silver and lavender rayon threads, the texture it will add will be amazing!!
Subscribe to:
Posts (Atom)