Last Saturday's inspiration excursion, was to Schreiner's Iris Gardens just North of Salem. The 10 acre display gardens are lush with an astounding variety of iris, inter-planted with perennials and annuals, lupine, columbine, alliums, clematis, larkspur, poppies and more. It is all surrounded with fields of blooming iris, with every color under the sun, the name iris comes from the Latin for rainbow. Lots of photo opportunities, and textile art inspiration. The speckled one might be fun to try with some decolourant. Columbine are hard to photograph because of their 3-demensionality, the spurs stick out the back and the cups come forward. Sara went on our girls road trip with us. This tall peach colored plant is a fox tail lily, very intricate and delicate color. It was a beautiful clear day, about 70', perfect for wandering up and down the rows, trying to pick a favorite from all the many choices. Then down a shaded columbine, hosta and rhododendron alley to another garden. The gift shop was still open and we each got a plant or two, I got a red wine colored one, and a smaller iris with white top and bottom, but burgundy stripes on the bottom petals. The best time to visit the gardens is between Mother's Day and Memorial Day, any time in May, they were a little early this year due to our mild winter. Next we went across the highway to Aldeman's Peony Gardens, see the next post. Then into downtown Salem for lunch and our favorite quilt shop, Greenbaum's Quilted Forest. With stops at the art supply store next door, and a scrapbook store kitty corner.
I will link this to Nina-Marie's "Off the Wall Friday" click on the badge in the right hand column to see what other talented textile artists are doing.
Art quilting, tips, techniques, thoughts and creativity. Textiles, antique quilts, fabric dyeing, fibers.
Friday, June 5, 2015
Thursday, May 28, 2015
Glass Blowing
I was out at the coast for Memorial day weekend, and saw a sign to "Blow Your Own Glass." I pulled a Yuie in heavy traffic, and went back and talked to the guy. He had some wonderful pieces he had made, and said I could make a flower, vase or ball. I had to think about it 'til the next day as it was rather spendy. But I would easily pay that for a piece of art glass, I'd just as soon have made it myself.His name is Gary Trebolo seasideglass@gmail.com Oops, just an email, I thought he had a website. Apparently several of the glass blowers working along the Oregon Coast are offering this opportunity to blow it yourself. He is located at the North edge of Florence, Oregon on Hwy 101. He was very patient and explained each step very well, he helped two 10 year old girls blow a globe after me, so anyone really can do it themselves. Starting with a wad of clear glass, white hot from the kiln, on the end of a long blow rod, I rolled it in crushed cobalt glass, and reheated it in the furnace. Reheat, add more cobalt, repeat, with crushed turquoise glass. After several applications of color, he reshaped it into a cone, and then added a big glob of clear over it all. The clear comes out of the white hot kiln, in the second pic he is adding the loop to the top of my finished globe. Adding the hanging loop. When we added the turquoise he gave it a swirl with pliers, just twisting it like it was Playdough. Me, blowing the glass globe, it took several tries, and had to reheat between each stage as it got larger and larger, I stopped at about an 8" diameter. Then it needed to go into a cool-down kiln overnight, if you change the temp too quickly it will shatter, so I picked it up the next day. I just couldn't wait to see how it turned out, it was red hot when we put it in the kiln. It was so much fun, I've always been interested in glass work, either lampwork beads, or stained glass, but it just another hobby to collect supplies for and never have the time to do it. He had quiet a setup of several furnaces, and three large kilns. I got to cross it off my bucket list. I took pictures as the evening light was disappearing, one inside and one outside. The turquoise swirls faded out a bit as it blended with the cobalt, but you can see the swirl on the bottom best.
I will link this to Nina-Marie's "Off the Wall Friday" click on the badge in the right column, and see what other talented textile artists are doing.
Sunday, May 10, 2015
Bernina Gift
I am so blessed, a long time quilt guild friend and Fyber Cafe member, has given me her older Bernina 730. It has the embroidery module on it. Wow! Also loads of disks and packets of CD patterns. Also 2 huge binders of instructions on using the software and special attachments. I did find the basic start up manual, thank GOD, I was getting a little over whelmed. Now to find room in my very crowded sewing room, for all of this and more, bags of thread, discs and patterns. I have always wanted to get an embroidery machine, this will be so fun to play with on summer vacation, when I want to stay inside with the air conditioner. I am cleaning up Charlie's "Man Cave" of tools and junk, sorting out the many items, 5 hammers and six saws, just too much stuff. I am going to make it into a painting/dyeing area, so all my shoe boxes of supplies can go down there, freeing up room upstairs in the sewing room. Back to work I go, gotta sort thru everything.
Sunday, April 26, 2015
Putting it All Together
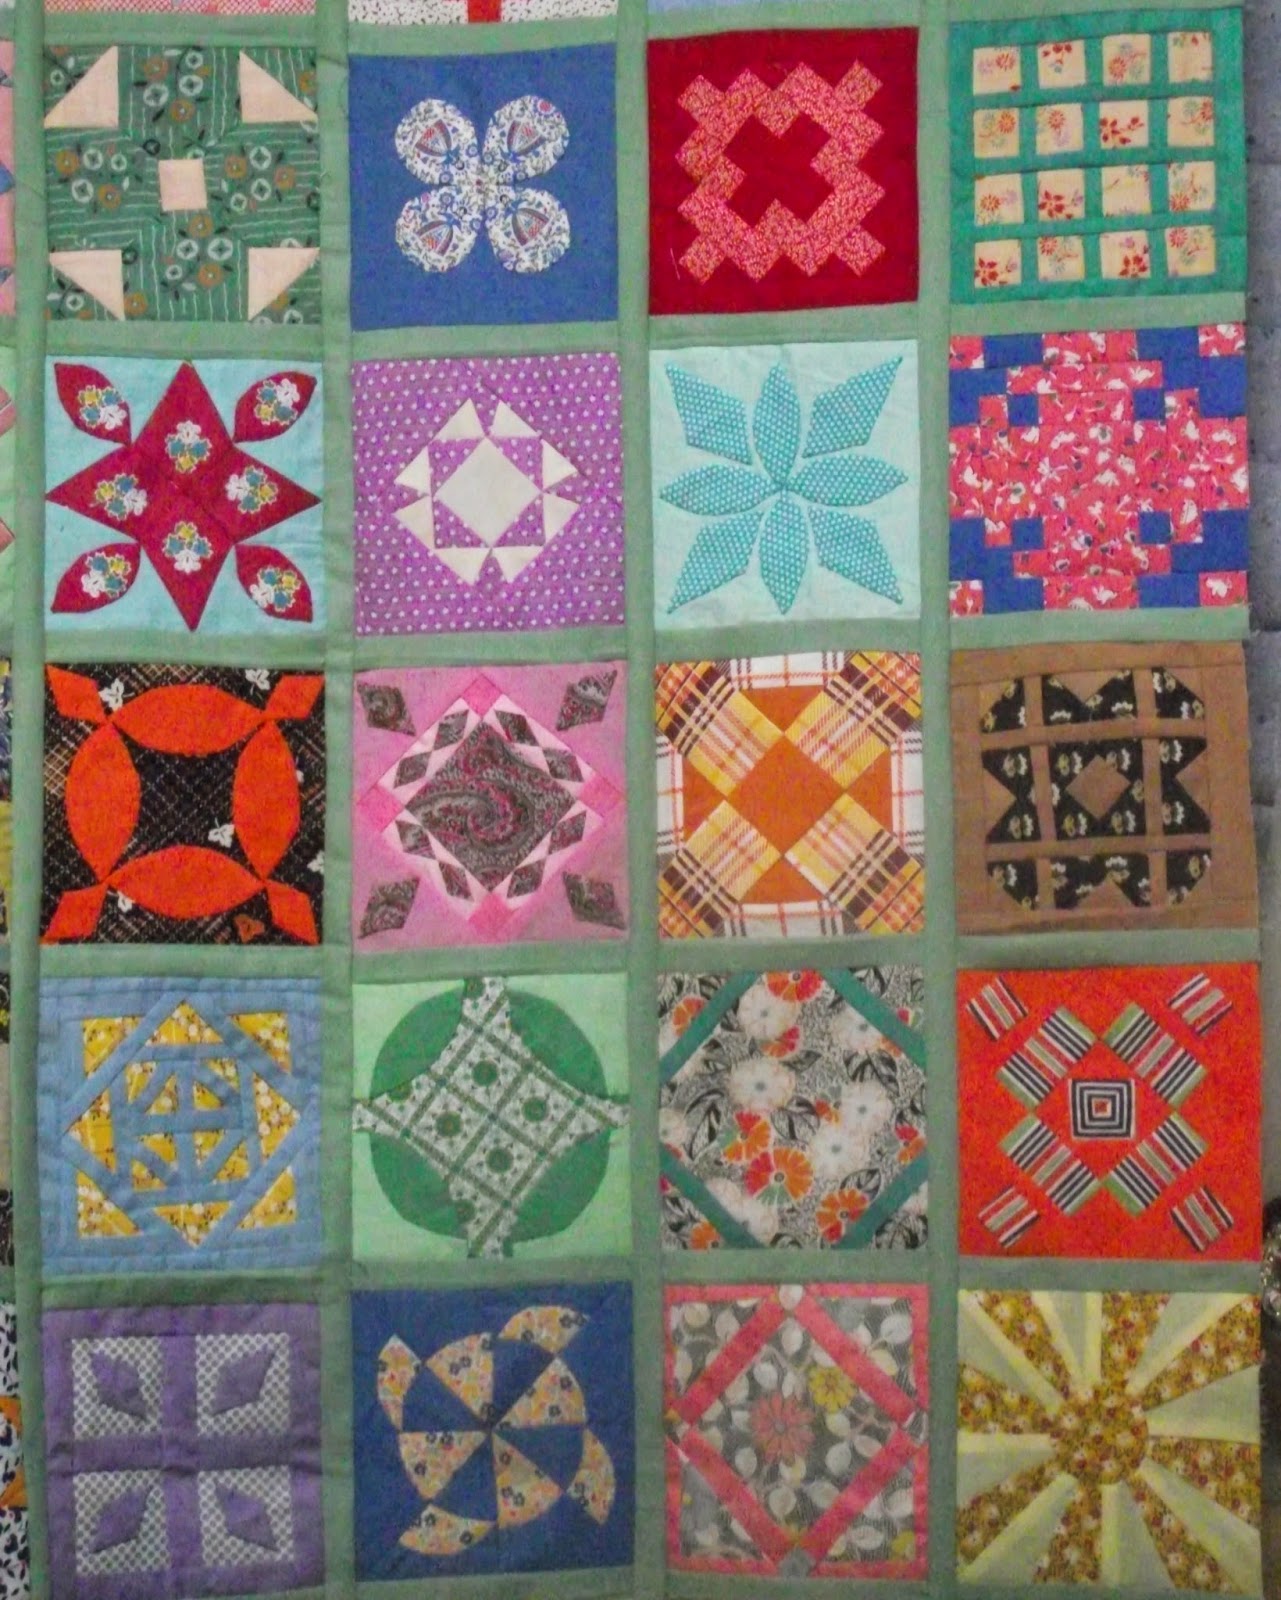
Rows A-E starting to go together. After a hectic weekend for my husband's funeral, I was finally able to relax. All the family had been up from California, as the last left on Wednesday, I took a long nap. Thursday was busy doing NOTHING, and by Friday I was ready to get back to my sewing machine. I had planned on putting together the Dear Jane blocks during spring break, but I worked in the yard and cleaned house instead. I reclaimed from a lost box, the 1920's solid green yardage. I had several pieces, the one large enough to do the sashing with was a bit darker than I remembered. But it is a nice neutral, but a little on the gray side. It tones down some of the brighter fabrics, contrasts well with the darker ones, but blends too much with the mid-tone fabrics. I have a very large piece of an even darker green that I will use for the backing. All the solid and print fabric is from the 1920-40's. I decided that I would try to machine quilt it in sections, on my home sewing machine. So I put together rows A-E, F-H, and I-M, I think these are a manageable size. I will figure out how to add the triangle border later. It may need some serious hand work and fudging to get in the corner kites.
Rusty Washer Fabric
The rust results are in. I carefully rinsed out the fabric, being careful not to get any washers down the drain. When wet the colors are very rich, we'll see how they look when dry. I am very pleased with the results, where the washers sat on the fabric there are definite circles, and the rust bled out to color the rest of the fabric too. I think the circles look a lot like leopard spots. This will be fun to play with, I'm thinking, I'm thinking.....
Landreth in our Fyber Cafe group, suggested several rinses in a heavy salt solution, to counteract the vinegar and neutralize it. So I gave it a good soak in salt water, I can still smell the vinegar, so I think I'll soak again.
Saturday, April 11, 2015
"OMG Don't Throw it Away!"
A couple of months ago, when we were building the wheelchair ramp out front, I accidentally left the can of misc. size washers outside. Thru rain, snow, wind and hail, it has been sitting out side. I went to pick up the rusty can, while I was cleaning up for the party, to throw it away. It almost went in the trash can when my brain seized up, and screamed "Oh My God! You can't throw that away!!" I have to do fabric rust with the washers. What a waste of good rust that would have been. So, saved from the landfill, I got a scrap piece of muslin, soaked it in vinegar, and spread out the washers. I carefully folded up the fabric, and put it back in the Cool-Whip tub to soak in the remaining vinegar. So, heads up, you'll have to wait for the next post to see what happens.
"Flabergast & Flotsam"
"Flabergast & Flotsam" on display at the Umpqua Valley Quilters' Guild Show in 2015. I finished it in time to enter it in our Fyber Cafe Challenge Display at the show. "Free Floating Flabergast" is the theme for this challenge, from a comic strip by Pat Brady. I added beads and shells to the base layer of my photograph printed on fabric, then free motion quilted with some trapunto. Over that I hung a dried piece of kelp that I found on the beach one day, completely dried as is. Onto the kelp I glued pieces of plastic, raffia, netting, bottle caps, wire and a feather. I think I'll take a close up and side view when I go back to the show today. It looks stunning on the black sheeting background.I also wanted the base to be more three dimensional, so I made two sand dollars with fabric. The real sand dollars I picked up on the beach, and put under the scanner. They looked kinda blah-gray, so I punched up the contrast and color in Photoshop Elements. I printed them on a white on white fabric with a rice pattern, just to make them look more interesting. I stitched the center pattern first, then trimmed the cotton batting, sewed on the back and turned them. A fine edge stitching finished them, they are not great, the color too blah and you really can't see the pattern of the photo, but they'll do. I hand stitched just a bit of the edge to the kelp photo, so that they stand out. I had thought about gluing on the real sand dollars, but they are just too fragile.
Here is the side view photo, and the closeups that I took at the quilt show.The sand dollar and feather are tucked beneath the dried kelp.
I am linking this to Nina-Marie's "Off the Wall Friday" click on the badge on the right hand column to see what other talented textile artists are doing.
Here is the side view photo, and the closeups that I took at the quilt show.The sand dollar and feather are tucked beneath the dried kelp.
I am linking this to Nina-Marie's "Off the Wall Friday" click on the badge on the right hand column to see what other talented textile artists are doing.
Subscribe to:
Posts (Atom)