Art quilting, tips, techniques, thoughts and creativity. Textiles, antique quilts, fabric dyeing, fibers.
Thursday, June 25, 2015
Bandon Art Retreat
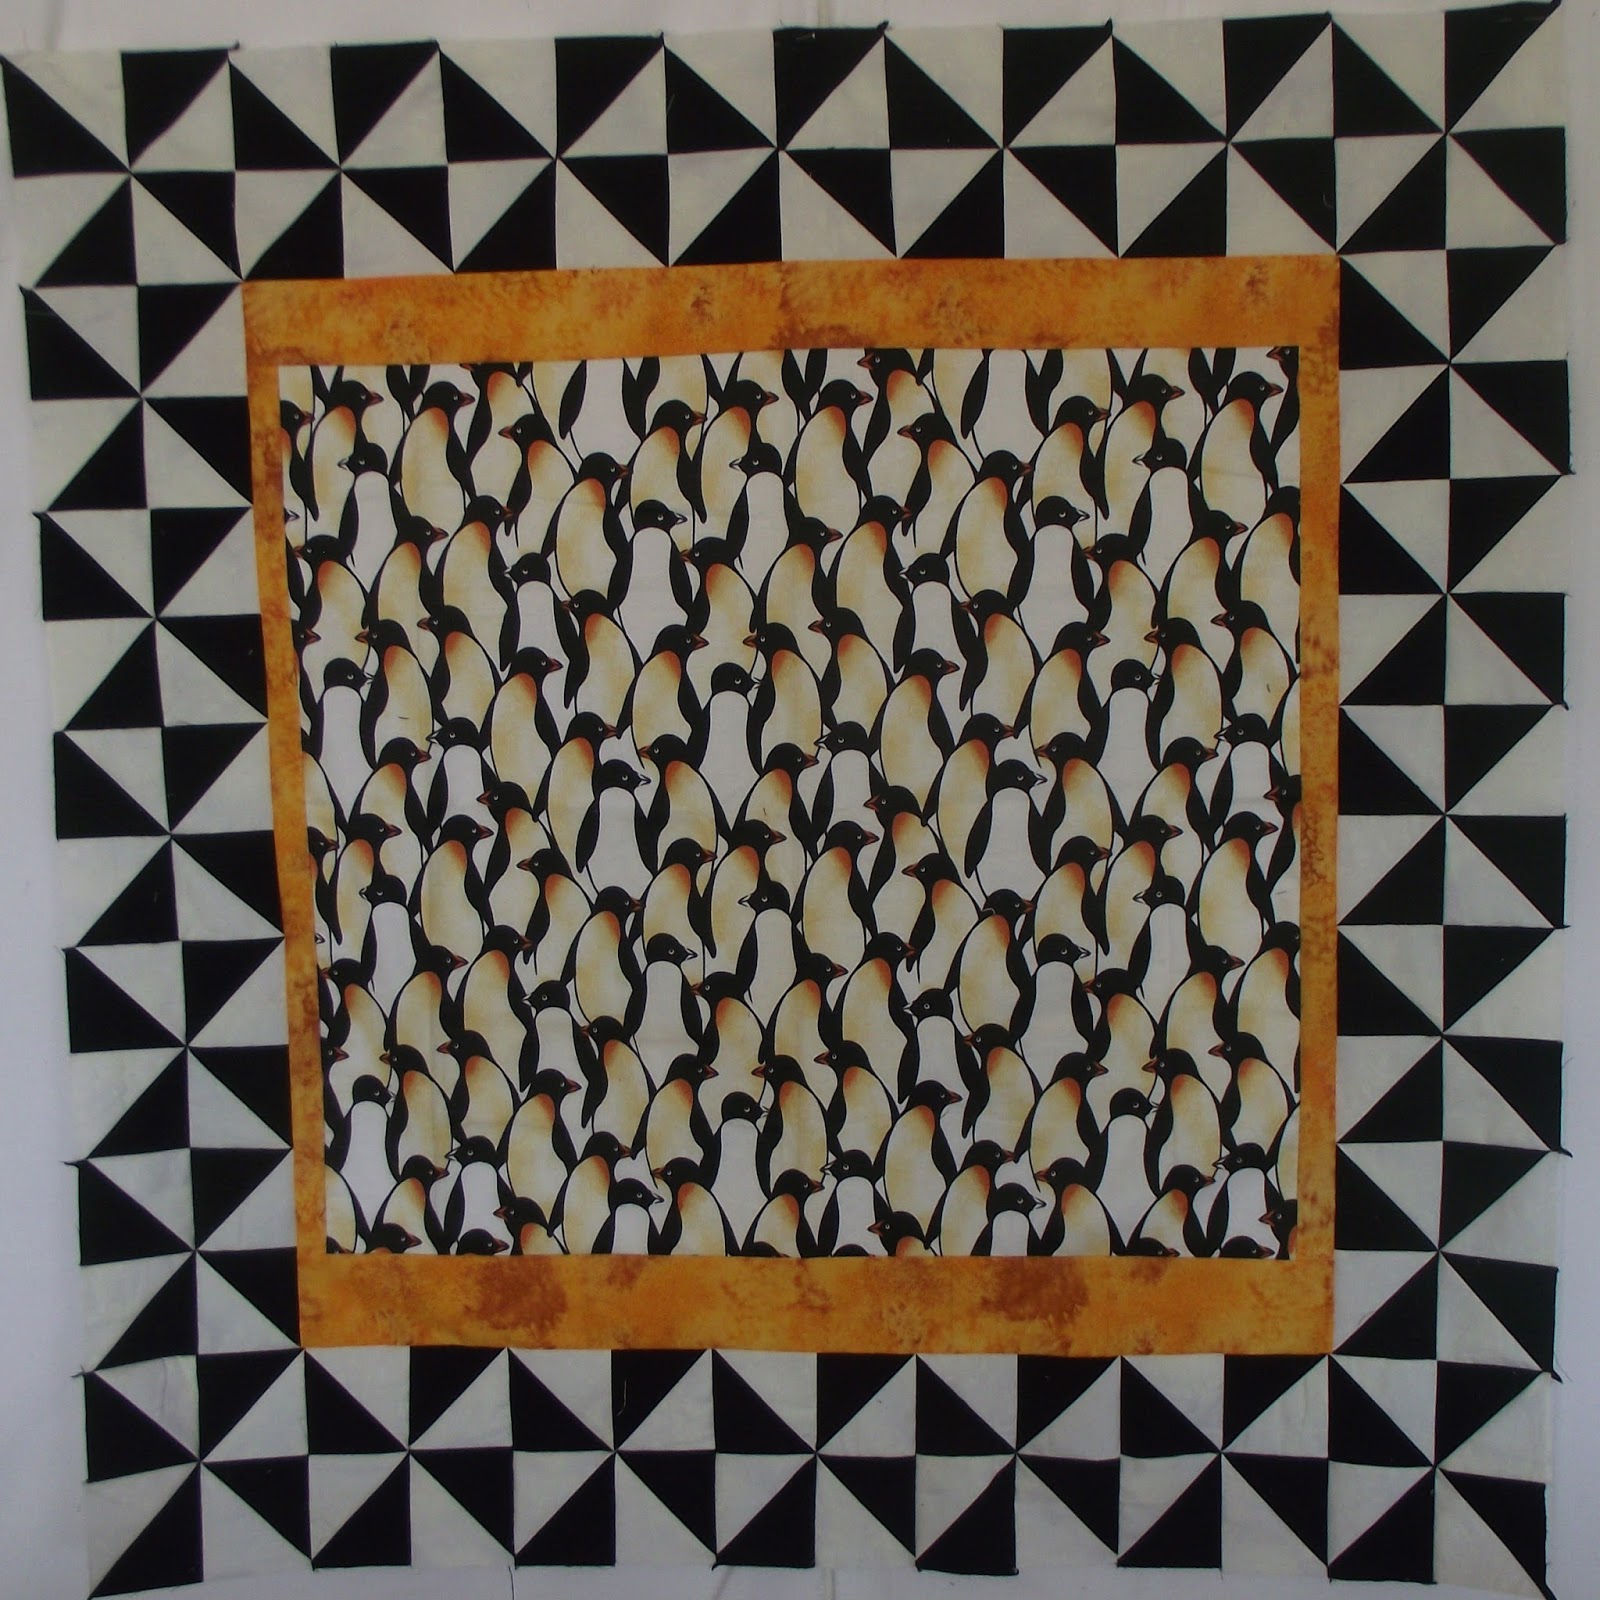
Eight talented artists went to a textile art retreat, on the Oregon Coast. We stayed at the Retreat Center above Forget-Me-Knots Quilt Shop. I organized the event with our Fyber Cafe members. There was no organized program, just work on whatever you want to. I started out by setting up my painting area. I was going to work on Gelli Plate mono prints. I had an 8 x 10 Gelli Plate and an 8" round homemade gelatin plate. A bunch of new stencils were exciting me, and I played with some of them. I was not really happy with my results, my white acrylic was not opaque enough, and others were dried up and just did not want to print. I was frustrated with paints I think are just too old and cheap. I want to buy a better quality of paint, instead of the bottles of liquid acrylic. I had several different brands, and they just don't have enough pigments to cover well, when making multiple layers.I did make about a dozen prints, and later went back and embellished these five with more stenciling and printing. They look ok now, with more layering. My niece is pregnant and wanted a baby quilt with penguins, in black and white. Fortunately I already had flannel fabric with penguins, I was planning for a different project. The penguin fabric is quiet a large print, so instead of cutting it up, I made just a large panel. The panel is surrounded by black and white pinwheels. I was going to add a penguin border, but it is already large enough to fit my backing fabric, I will bind in it the gold color. Needing another project, I went downstairs to the quilt shop and bought two sets of pre-cut hexagons. One is a Moda, spring prints collection, the other Moda's fall solids. They went really well together since it was the same manufacturer.The hexies came with a plastic template, with holes in the quarter inch seam point on each corner. I made a small dot with a Pigma pen, then sewed by machine from point to point. They went together real well, I would only sew by machine hexies that are 4" or larger, these were six inches. However they are not really my colors, so I don't know what I am going to do with them. It only took me the afternoon, to put them all together.After lunch at the Bandon Bakery of wonderful sandwiches on home made bread, 4 of us went on a road trip to the Langlois Wool Shoppe, about 15 minutes South of town. She has a great selection of fibers for needle felting and spinning. Lots of sample of needle felting too, in pictures and 3-D sculpture. I got a set of individual needles, and a couple of small packs of dyed wool. I have a lot of materials at home. Meredith bought some material for her granddaughter to play with. Cheryl showed Annaka how to needle felt and after watching them for awhile I decided I wanted to make a rabbit. His head took the most work, and he is made with wool, then covered in a silver white angora rabbit fur. He was lots of fun to make, but my hand started to cramp after holding the single needle for so long. But I did get him mostly finished, I want to add more angora to a couple of spots. Cheryl was making little mouse baskets, for class samples.Lorrie and I snuck away early one morning to go walk on the beach, the tide was out enough so we could walk all the way to the rocks at the South end of the beach, the weather was also beautiful, no fog! If you want to see what other members of Fyber Cafe made during the retreat, read their blog here. I am also linking this to Nina-Marie's "Off the Wall Friday" so click on the badge in the right hand column, to see what other talented artists are doing this week.
Friday, June 19, 2015
Digital Surface Design
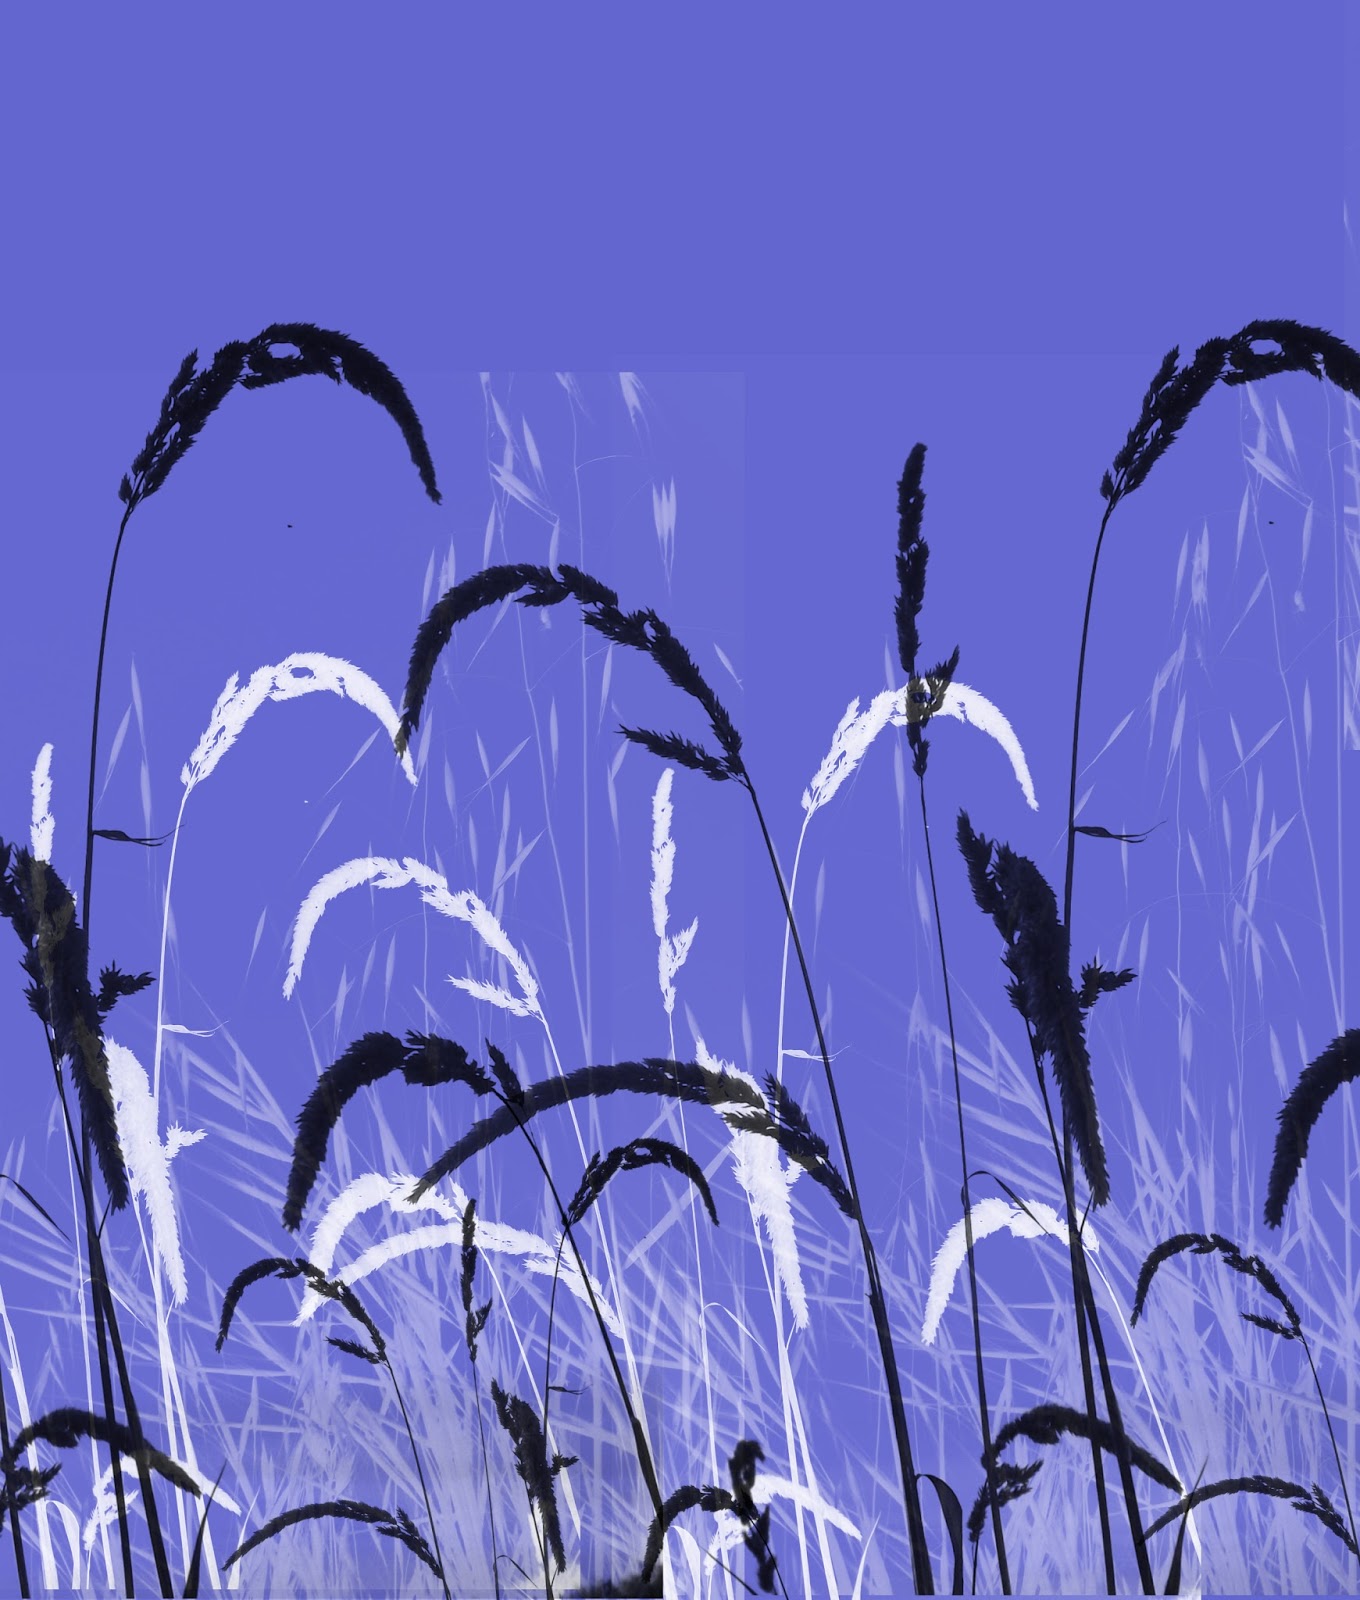
For my birthday I treated myself to a DVD by Diane Doran called "Digital Surface Design" click here Diane Doran I love her color and the patterns she creates with this technique. I watched it completely through on the TV and made notes, my DVD player on the computer was messed up. What fun it is!! She shows you how to blend photograph colors for interesting backgrounds, to replicate hand dyeing techniques. Then the part I was really interested in was how to put the patterns of grasses or leaves onto the layers.I worked with some different types of grasses and two different gingko leave photographs. It took me a while to get started as I only have Photoshop Elements 6 and she was working with version 11. But once I got some of the color choosing figured out, I was able to make simple backgrounds, I did not fuss with more detailed ones.Then doing the "brushes" for printing your design was actually very easy. She did not go into how to create a good quality image, by increasing the contrast and converting to black and white, so that you have a good silhouette to work with. But I had already played with that on my own. Once I got the hang of things, after a bit of trial and error, I had a lot of fun. Of course the color ink on my computer sucked itself dry, it was low to begin with, and I only printed one onto fabric, than I thought I would just do 4x6 prints on paper to see how they looked. What fun it was, I still have not tried the different "Style" choices, "textures" and lots of other things, but it was a good start. I did learn how to make different size images, to layer them and make different layers to overlap color changes. Now I need to go through my photos to see what would be useful with this technique. I know I have lots of birds on branches, seed pods, berries, and other natural elements that would make good silhouettes. I did make a few notes as I worked out my issues, so the trick will be if I can do it again tomorrow, without having forgotten every thing I learned today. Now to run to the store for more color ink, treat some more fabric with bubble jet set, and run around with my camera taking useful pictures.
I will also link this with Nina-Marie's "Off the Wall Friday" click on the badge in the right hand column to see what other creative textile peolpe are doing.
Thursday, June 18, 2015
This & That
Well, That's a first, I actually stitched through the plastic head of a pin. I could not figure out why the pin would not come out, the thread went right through the head. I usually remove pins before stitching over that point, but it was hiding in a seam allowance. After my dilemma about spending my time on Friday, I went after my husband's wood burning tools, to try and cut a plastic stencil. I know he had given me my own set, but I could NOT find them anywhere.I had some where seen a stencil with overlapping circles, and thought I could do that. I used a compass that kept collapsing on me, no matter how hard I turned the tightening knobs. But I finally got it drawn out. It is about 6" across, I used the clear plastic from the top of a deli take out container. It was much tougher and thicker than the X-ray plastic I have been using. I'm not sure the clear is an advantage, over the darker X-ray plastic. I can see through it for placement, but it is hard to see the actual stencil. I ended up using a small pair of scissors to cut the stencil, the tip of the wood burning tool left a raised ridge where the plastic had melted. I know I have a "stencil tip" like an X-acto knife, for the burning tool, but again, could not find it. I finished up the paper mache bowl that I made with the fabric scraps from my Gelli printing. I wanted to put buttons and beads around the edge. A collection of blue buttons and an assortment of seed and bugle beads was glued on with E6000. I wanted something more permanent than a glue gun adhesive. But open the window!! It stank up my whole room for a day. I like the sparkle that it gave the bowl, and a nice substantial edge, rather than the thinness of the paper mache. I am still working on my "Dear Jane" quilt, machine quilting in the ditch around each and every freaking little piece. I am doing it in 3 sections so it will fit under my home sewing machine. This view of part of the back, shows the intricacies, imagine each block is only 4 1/2" finished size. Getting about 3-5 done each day, I am slowly working my way thru the 169 blocks, only about 50 left to do. After burning out on the Dear Jane's, I am trying to finish up a wedding quilt for my nephew and his wonderful bride. The center panel and paper pieced pine trees was done awhile ago, but now I have to get serious. Remember when I said I work better with a deadline? Well, we get to test this theory. The wedding is July 25, and I am flying out a bit earlier and want to get it in the mail before I leave. I have gotten the maple leaves on with a dark blue border. I have no pattern, just kinda winging it with my box of flannel scraps, kind of like a round robin, just keep adding borders 'til it is big enough. I am aiming for Queen size, but we will see how fast it grows. Each of the nieces and nephews have a baby quilt, plus one other lap size or wall quilt. Now that they are older, I am working on a bed size quilt for each. I have two nephew's tops done and my sister's daughter, I just have to sew on the last border. Thankfully they are taking their time about getting married, they range from 24-34 years old. So after a difficult start to the summer, I am zipping right along, but next week, I am taking time to go to our art group's 3 day retreat on the Oregon Coast.
I am linking this to Nina-Marie's "Off the Wall Friday" click on the badge in the right hand column, to see what other creative textile artists are doing each week.
Friday, June 12, 2015
Now What?
Faced with the first day off of work, I am faced with a dilemma, what to do? Mow the lawn, weed the garden, Baby quilt that has a due date(I mean deadline), goof off, paint fabric, keep quilting my Dear Jane, go thru my closet and throw stuff out, eat chocolate for breakfast, clean my studio? The choices are too many! It boggles the mind. Without my husband here to interfere with my plans, I am at a loss as to what to do first. If I was stealing bits of time around him, it would be easy, a little of this or a little of that. But now, the time is ALL MINE, WOW! I am just wandering without focus. I always knew I work best with a deadline, I plug away at something and it gets done on time. But no structure at all to my day, just plain weird. I never thought my husband's passing would leave me feeling like this. I have lots of activities scheduled for the summer, a retreat, several quilt shows, group art workshops, visit my sister in Seattle, but without a day to day plan, I am a bit lost. I did manage to sleep until 7am, after getting up at 4:30 every morning, that seams like heaven. So I think I'll just sip my tea in the garden, in the cool summer morning, and read my book and just relax. That is the "goof off" part of the "to do list."
Friday, June 5, 2015
Inspiration Iris
Last Saturday's inspiration excursion, was to Schreiner's Iris Gardens just North of Salem. The 10 acre display gardens are lush with an astounding variety of iris, inter-planted with perennials and annuals, lupine, columbine, alliums, clematis, larkspur, poppies and more. It is all surrounded with fields of blooming iris, with every color under the sun, the name iris comes from the Latin for rainbow. Lots of photo opportunities, and textile art inspiration. The speckled one might be fun to try with some decolourant. Columbine are hard to photograph because of their 3-demensionality, the spurs stick out the back and the cups come forward. Sara went on our girls road trip with us. This tall peach colored plant is a fox tail lily, very intricate and delicate color. It was a beautiful clear day, about 70', perfect for wandering up and down the rows, trying to pick a favorite from all the many choices. Then down a shaded columbine, hosta and rhododendron alley to another garden. The gift shop was still open and we each got a plant or two, I got a red wine colored one, and a smaller iris with white top and bottom, but burgundy stripes on the bottom petals. The best time to visit the gardens is between Mother's Day and Memorial Day, any time in May, they were a little early this year due to our mild winter. Next we went across the highway to Aldeman's Peony Gardens, see the next post. Then into downtown Salem for lunch and our favorite quilt shop, Greenbaum's Quilted Forest. With stops at the art supply store next door, and a scrapbook store kitty corner.
I will link this to Nina-Marie's "Off the Wall Friday" click on the badge in the right hand column to see what other talented textile artists are doing.
Thursday, May 28, 2015
Glass Blowing
I was out at the coast for Memorial day weekend, and saw a sign to "Blow Your Own Glass." I pulled a Yuie in heavy traffic, and went back and talked to the guy. He had some wonderful pieces he had made, and said I could make a flower, vase or ball. I had to think about it 'til the next day as it was rather spendy. But I would easily pay that for a piece of art glass, I'd just as soon have made it myself.His name is Gary Trebolo seasideglass@gmail.com Oops, just an email, I thought he had a website. Apparently several of the glass blowers working along the Oregon Coast are offering this opportunity to blow it yourself. He is located at the North edge of Florence, Oregon on Hwy 101. He was very patient and explained each step very well, he helped two 10 year old girls blow a globe after me, so anyone really can do it themselves. Starting with a wad of clear glass, white hot from the kiln, on the end of a long blow rod, I rolled it in crushed cobalt glass, and reheated it in the furnace. Reheat, add more cobalt, repeat, with crushed turquoise glass. After several applications of color, he reshaped it into a cone, and then added a big glob of clear over it all. The clear comes out of the white hot kiln, in the second pic he is adding the loop to the top of my finished globe. Adding the hanging loop. When we added the turquoise he gave it a swirl with pliers, just twisting it like it was Playdough. Me, blowing the glass globe, it took several tries, and had to reheat between each stage as it got larger and larger, I stopped at about an 8" diameter. Then it needed to go into a cool-down kiln overnight, if you change the temp too quickly it will shatter, so I picked it up the next day. I just couldn't wait to see how it turned out, it was red hot when we put it in the kiln. It was so much fun, I've always been interested in glass work, either lampwork beads, or stained glass, but it just another hobby to collect supplies for and never have the time to do it. He had quiet a setup of several furnaces, and three large kilns. I got to cross it off my bucket list. I took pictures as the evening light was disappearing, one inside and one outside. The turquoise swirls faded out a bit as it blended with the cobalt, but you can see the swirl on the bottom best.
I will link this to Nina-Marie's "Off the Wall Friday" click on the badge in the right column, and see what other talented textile artists are doing.
Sunday, May 10, 2015
Bernina Gift
I am so blessed, a long time quilt guild friend and Fyber Cafe member, has given me her older Bernina 730. It has the embroidery module on it. Wow! Also loads of disks and packets of CD patterns. Also 2 huge binders of instructions on using the software and special attachments. I did find the basic start up manual, thank GOD, I was getting a little over whelmed. Now to find room in my very crowded sewing room, for all of this and more, bags of thread, discs and patterns. I have always wanted to get an embroidery machine, this will be so fun to play with on summer vacation, when I want to stay inside with the air conditioner. I am cleaning up Charlie's "Man Cave" of tools and junk, sorting out the many items, 5 hammers and six saws, just too much stuff. I am going to make it into a painting/dyeing area, so all my shoe boxes of supplies can go down there, freeing up room upstairs in the sewing room. Back to work I go, gotta sort thru everything.
Subscribe to:
Posts (Atom)