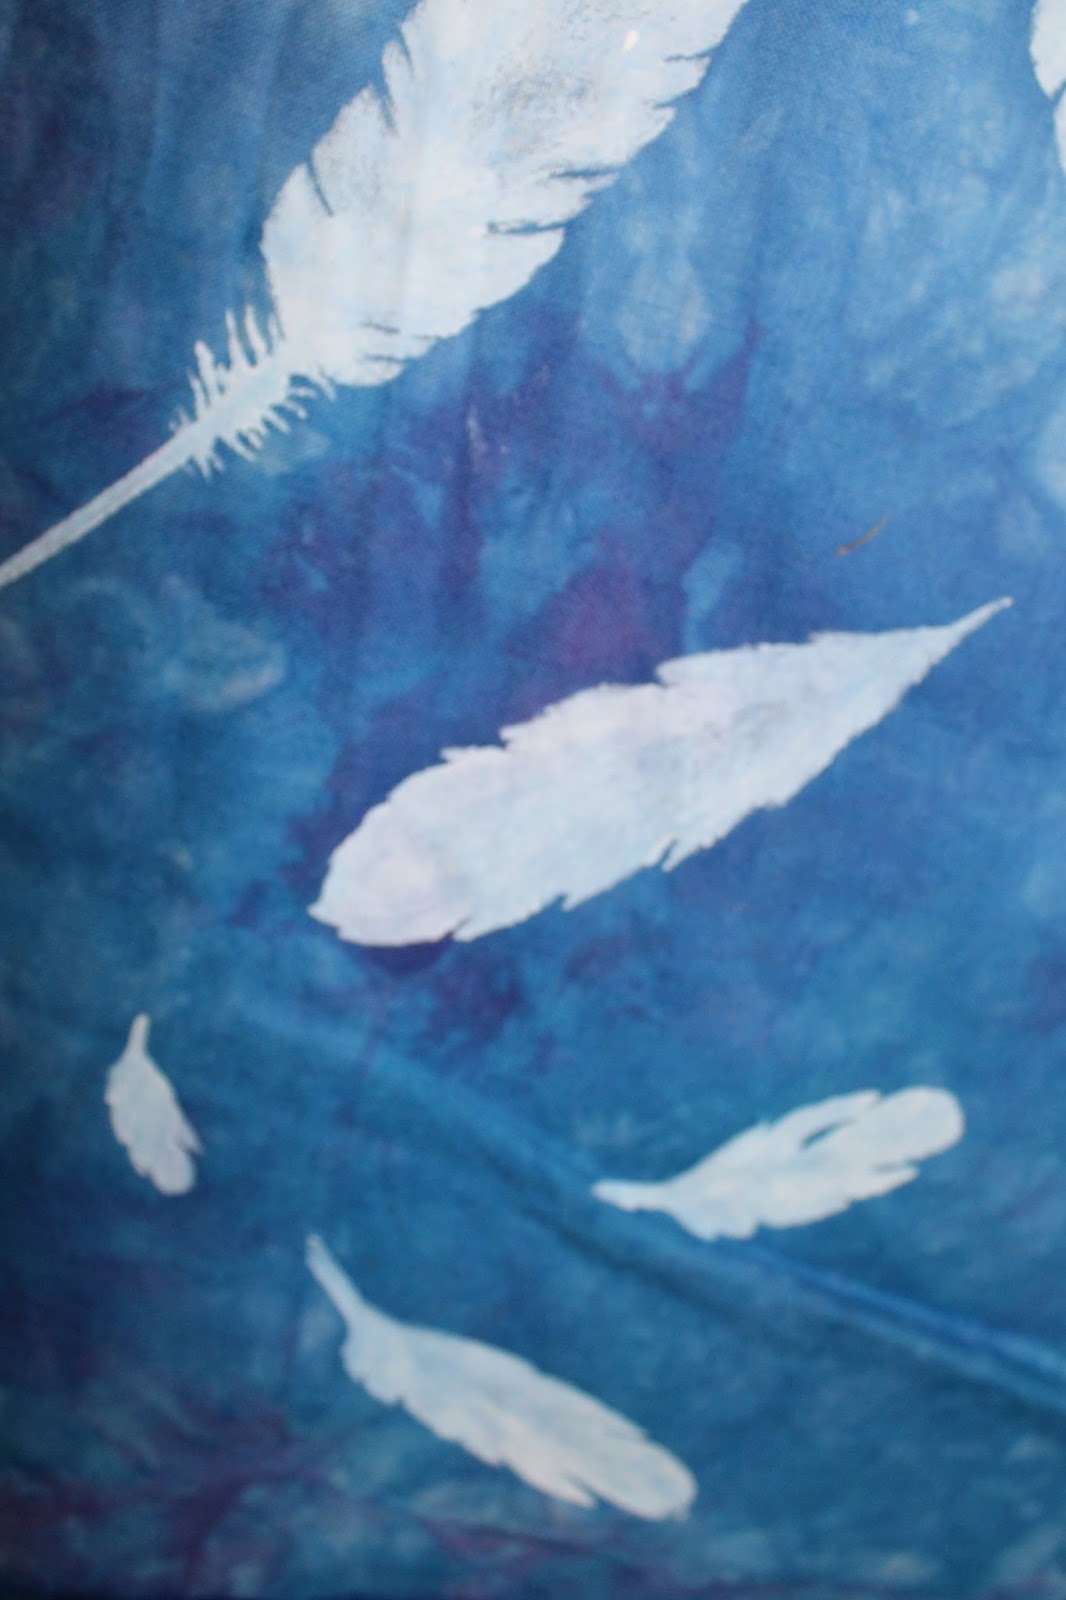
This fabric is for my Fyber Café challenge, the Theme is "Flights of Fancy." I am going to hang it vertically with the smallest feather at the top, and getting larger as they fall down. It is based on the old myth of Icarus making a set of wings, and gluing feathers on with wax, as he tried to fly to the sun, the wax melted, the feathers came off, and he fell to earth. I will make a round sun, with hand dyed fabrics and put it at the top of the hanging. I don't know how I want to embellish the sun yet, I am thinking Angelina fibers, or prairie points. The bottom feather has a curved tip as it hits the bottom of the wall hanging. In the newest issue of Quilting Arts magazine, they have an article on free motion stitching feathers. I am going to do that, but have the light white stencil behind my stitching, that will give me additional guide lines, and make the feathers stand out more, since they are the focus of the art. Now to do some quilting, cause the deadline is FAST approaching. I am linking this to Nina-Marie's "Off the Wall Friday" click here check to see what other talented textile artist did this week.
Art quilting, tips, techniques, thoughts and creativity. Textiles, antique quilts, fabric dyeing, fibers.
Tuesday, April 4, 2017
I'm an Addict
Yes, I Amy, am a stencil addict. I admit that anytime I see a new stencil, I have to have it. I've even been known to buy a duplicate stencil, cause I did not know I had it already. I've made a list, to help me remember, but I don't take the list with me. And since I am an addict, I have to buy it immediately. So when I wanted a feather stencil, I knew I had one in several different sizes. I did not expect to come up with eight of them. Although several are large decorative feathers, kinda fancy, and I wanted realistic. I also had a stencil from The Crafters Workshop, designed by Jennie Bowlin, and a Jennie Bowlin Studios stencil, that are exactly the same. I feel ripped off, since I knew it was a different company, I knew I did not have that stencil. I even bought the Brother Scan N Cut machine mainly because I could design and cut my own stencils with it. And I do, and I love it. One of the stencils was adhesive, I'm not sure about it. I had to pick out all the little cutout bits and they stuck to everything. I pealed the release plastic sheet only half way off to use one stencil, but had to remove it completely to get to the center one. Then it stuck where I had just painted. The stencil stuck to stuff I did NOT want it stuck to, and was hard to peel off the fabric when finished, I was afraid I would tear the stencil. Then getting the plastic film back on when done was a struggle too. I never have trouble with stencils moving while I use them, I pin to a foam core board if I need to, or use basting spray to lightly coat the back of the plastic with spray adhesive. I will NOT be buying any more adhesive ones. I found two pieces of hand dyed blue fabric, the fat quarter, I was going to use for my project, and the narrow strip for practice machine stitching. But as I started to stencil, I thought why not just use the strip for my project. I started with the smallest feather, about an inch long, and added medium, then larger sizes. I painted one feather from each stencil, except for some of the larger, fancier ones. On the smallest stencils, the vein lines are very fine and hard to see, with the medium and large, they were more varied and distinct.I used a Liquitex Acrylic white craft paint, it was fairly opaque, and I wanted it to look soft, not stark white. I used a stiff brush and used it dry with very little paint. You have to paint from the tip to the stem, so all the little bits of plastic don't get bent out of shape, and this helped keep the brush strokes staying in a consistent direction.
This fabric is for my Fyber Café challenge, the Theme is "Flights of Fancy." I am going to hang it vertically with the smallest feather at the top, and getting larger as they fall down. It is based on the old myth of Icarus making a set of wings, and gluing feathers on with wax, as he tried to fly to the sun, the wax melted, the feathers came off, and he fell to earth. I will make a round sun, with hand dyed fabrics and put it at the top of the hanging. I don't know how I want to embellish the sun yet, I am thinking Angelina fibers, or prairie points. The bottom feather has a curved tip as it hits the bottom of the wall hanging. In the newest issue of Quilting Arts magazine, they have an article on free motion stitching feathers. I am going to do that, but have the light white stencil behind my stitching, that will give me additional guide lines, and make the feathers stand out more, since they are the focus of the art. Now to do some quilting, cause the deadline is FAST approaching. I am linking this to Nina-Marie's "Off the Wall Friday" click here check to see what other talented textile artist did this week.
Wednesday, March 29, 2017
Ducks in a Row
FINISHED! The Umpqua Valley Quilters' Guild Show is coming up in a few weeks, so I have been madly sewing bindings, and labels. "Getting My Ducks in a Row" is done, all the sections quilted a row at a time, are done, and the border added. The flannel border fabric is leftover from a commissioned ducky quilt I made a few years ago, there was just enough to get 4 1/2" borders from it. I free motioned stipples in the background and outlined the ducks. It is lots of fun with all the yellow duckies, they are from the H2O themed Row by Row from 2015. "My Summer Travels" was done a while ago, but I had not gotten a picture of it. So I had my friends came over, so they could hold it up, to take the picture. It is from the row x rows from 2016, themed "Home Sweet Home. I also have another one almost finished in this format from the 2015 rows. I just need to add the left hand rows and add a border to it. Then I still have extra rows made, I probably made 40 rows from the first year I participated. This year I only made the ones I needed for the quilt, choosing my favorites, the ones that would go together well. I'm going to be traveling next month, to Bryce & Zion Nat'l. parks, and the Grand Canyon, Phoenix and Tucson. Too bad they don't start this year's that early. I know I asked one of the shops what this year's theme is, but I can't remember what it was. On Friday I will link this to Nina-Marie's "Off the Wall Friday. click here Check it to see what other talented textile artists are doing this week.
Sunday, March 26, 2017
Party Girls
"Party Girls" is finished! I finally got all the beading done and the hand sewn binding. This started with some figures of women I traced from "O" Magazine, and put into my Scan N Cut machine. I cut them from various light colored batiks, then searched for a dark background. I bought several different fabrics, with stars, fireworks, metallic etc... before finally settling on this purple. I wanted more than just a solid background, so I added the black and white triangles, and the solid black and purple at the top and bottom. I cut it up into various widths, and put it back together like a bargello. I wished I had taken more time with the triangles, so the points matched up better on each strip. I don't know how much this extra work shows up, but I am glad I did it. It is free motion machine quilted with raw edge applique. I went through several packages of rhinestones, looking for the right materials for the disco ball. I ended up with a scrap booking product, a sheet of squared rhinestones. It comes in different colors too. It was super easy to work with, it's plastic, so it cut easy with the scissors and I was able to stitch right through it. I used a zigzag stitch to put it on, and it pierced the plastic with no problems. I will definitely use this material again. I used some clear mylar Sulky thread, around the ball, and for rays of light shooting out from it. I hand beaded seed beads and bugle beads, in crystal and pearl, to make rays of light. I think it was lots of fun. There is one more figure to the left, and the ball is very centered, but I missed it in the photo. Check out all the talented textile artists on Nina-Marie's "Off the Wall Friday" click here
Friday, March 10, 2017
Soy Wax Resist
My friends Susan and Jenny came over to work with the soy wax again. Jenny is working on a batik based on a Maxwell Parish painting. She is doing it for the Fyber Café challenge "Flights of Fancy." Susan and I added another layer of dye and wax to the pieces we made last time and waxed a few more. I got two new drying racks at Grocery Outlet when I was in Washington. A great deal at $7.50, the ones at Walmart are $20. I added the bling to the characters of Earth, Wind, Fire and Water. Using Sulky mylar gold thread, I free motion stitched slowly so I could get a long stitch length, so the gold would show well. I also finished the binding and label. The tension was off when I stitched the white so I had white dots pop up on the black backing, so I used a Pigma pen to color all the dots black. It looks so much better now.When I was at my sister's in Washington, I got this beautiful Poppy fabric at Quilting Mahem in Snohomish. I got the last 2 yards on the bolt, and wanted to just do a simple setting. I cut out large 8" squares and added either the coral print or teal/coral batik in a 2 inch border. I had enough floral to set it on point, and do a decent width border. I did go back and get another 1/2 yard of the teal and coral, so I had enough for a final border and binding. It only took me a couple of easy afternoons to get it finished. It's about 70" square. I will be linking this to Nina-Marie's "Off the Wall Friday" click here check to see what other awesome textile artists are doing this week.
Friday, February 24, 2017
Earth, Wind, Fire and Water
I have made a small wall hanging from one of the fabrics that I made at Craft Napa. It is a bold black and white shibori print, that I wanted to add red to. At Craft Napa, I had stenciled the 3 red circles, and printed the paisley stamp, and used the end of the brush to do the red dots. It looked very oriental so I stenciled the Japanese characters for Earth, wind, fire and water onto the clearest spots. It looks rather crowded and the characters don't stand out very well. I am going to outline them with several rows of stitching with a gold metallic thread, to help them show better. I accidentally started to free motion quilt with regular polyester thread, in black, so I continued with the white thread. However it shows why I like to use rayon thread with the size 90 needle. The rayon fluffs up a bit and fills the larger holes made with the 90 needle. I used a red rayon thread on the circles and dots. I will add some outlining on the paisley when I get home to go thru my threads for the right color, it is kind of burgundy. I am up near Seattle visiting my sister, I brought a few small projects with me. I started to stitch the binding, but the light is not good enough to hand stitch black on black, so I'll wait 'til I am home. I am going to give the wall hanging to my nephews to thank them for their hospitality, while staying with them while in Napa. Check out the link to Nina-Marie's "Off the Wall Friday" to see what other great textile artists are doing this week.click here
Friday, February 17, 2017
Lorraine's Tote Bag
I am finishing the last of the Round Robin Tote Bags, this one belongs to Lorraine. She likes a modern style, and I have used a black background. The first two sections done by others in our textile art group, have circles, curves and are made in browns, beige, & rust on black. I drew a sketch to get started, but the applique is different. I kept the large curve and my fabric choices dictated the size of the circles. I made the curve into a pocket, so I added batting and a backing, and quilted it separately. The first 3 sections are together, I think my addition works with the whole. The last side section was all that was left. Since I am doing a section for Clare, who is weaving us handles, I did this section too. I found some brown, rust, black prints at the shop in Snohomish, Washington. I wanted the section to look as if a different person did it, but still combine well with the previous sections. I fussy cut the border off the circles print, and fussy cut 3 large circles from the 2nd print. A pale cream batik worked for a light background. The other sections are "simple" I kept wanting to fill in the empty spaces, but the modern look is more sparse. So I decided to add some beads to embellish the last side. A quick trip to Ben Franklin scored some rust/red glass circles. I will also add a few seed beads to the large fabric circles. I am linking this to Nina-Marie's "Off the Wall Friday." click here to see what other textile artists are doing this week.
Thursday, February 9, 2017
Evening with Judy Coats Perez
The first day at Craft Napa, I also took an evening class with Judy Coats Perez. The class was for making foam stamps. She had an adhesive foam sheet for each of us, a clear polyester film and tracing paper. I had not used adhesive foam before, I had tried to use Elmers to glue two regular sheets together, which did not work very well. We drew designs on the tracing paper with a pencil, and flipped it onto the foam. Then we rubbed over the back of the paper and it transferred the image to the foam. The designs were cut out with an Exacto knife, the paper backing pulled off, and it was adhered to the clear polyester film. I ended up just using my paper scissors to cut out the design on the foam, unless it was a very tiny area. Judy had several reference books for us to use, one was flowers and plants, the other animals drawn in different cultural styles. I did the animal stamps from some of the images I found in the book. The back of the alligator was cut with a scalloped paper crafting scissors, as well as some of the leaves in the previous photo. I really liked putting the foam on the clear polyester film, being able to see through it was great for alignment when printing. The sheets are called Dur-a-lar .005 thickness, the pack I got at the art supply was 25 sheets for $12.50. She said you can also order it from Dick Blick catalog. I wonder how it will work for cutting stencils? It was a good weight and certainly cheaper than stencil plastic. In Sue Bleiweiss' class, she also gave us foam but she used a heavy book cover cardboard, because she used to bind books, and she had a lot of it! At the evening class with Judy everyone was already tired from the full day of class. We thought the class was maybe 6-8pm, no one could remember, but the class was 6:30 to 9:30. Whew, we were tired, but class was low key, just cutting up foam for stamps. We all kind of faded at 9 and left early. Last week two friends came over and we played with soy wax. Jenny wanted to do a batik for the Fyber Café challenge "Flights of Fancy." I told her how the soy wax was much better than the traditional paraffin and beeswax mix. The soy wax melts at a low temp and washes out with hot water. Even tho I first remove as much wax as possible with newspaper and an iron, before putting the fabric in the washing machine. She is drawing a fairy sitting on a rock, based on a Maxfield Parrish painting. Susan and I just played with stamping the wax onto fat quarters, with different tools. I used a squiggly bendy straw for the purple dyed one. I already had some dye made up, and I made a dye thickener to paint dye with. The directions for the sodium alginate said "add a little to some fluid" how do you interpret those directions? I put a teaspoon in a pint Mason jar of water and stirred it up. It clumped instantly and took a bit of stirring but it thickened fast. I probably could have used less powder. We had little paper cups, added about 2 tablespoons of goop and a good squirt of dye, then we used foam brushes to apply the dye. We cleaned up at noon, Susan and I will add more wax and dye layers at another time. We went to Los Dos Amigos Mexican restaurant for Margaritas... and lunch.
I am linking this to Nina Marie's "Off the Wall Friday" click here to see what other talented textile artists are doing this week.
Subscribe to:
Posts (Atom)