Saturday, October 26, 2013

Layered Botanical Prints

Several more of the botanical Gelli Plate prints have been layered with stencils and acrylic paint. These 3 have a darker color paint for the stencil, but when I add background detail I tried to add a white and a dark. Then I added just a bit of another color for an accent. The sequin waste, I paint with a very dry stiff brush, for subtle color. I made a piece of template plastic, with one hole punch, so I can place a single small dot precisely placed. I also have a favorite tool, a silicon hot pad with a hexagon pattern on it, very flexible and rubbery, it makes great delicate texture. I just brush on a small bit of paint, and print with it.
A close up of the light teal print. It has several subtle shades, and textures.
The blue print on the left, has the same blue, painted stencils, as the ghost print on the right. My Ultramarine blue faded to turquoise with the addition of white, I also used a silver metallic paint on the two blue prints. I also cut a small dragonfly stencil about 1" across. Now I can't wait to free motion quilt them, and thread paint some 3-D dragonflies! How to thread paint a dragonfly

Friday, October 25, 2013

Botanical Gelli Prints

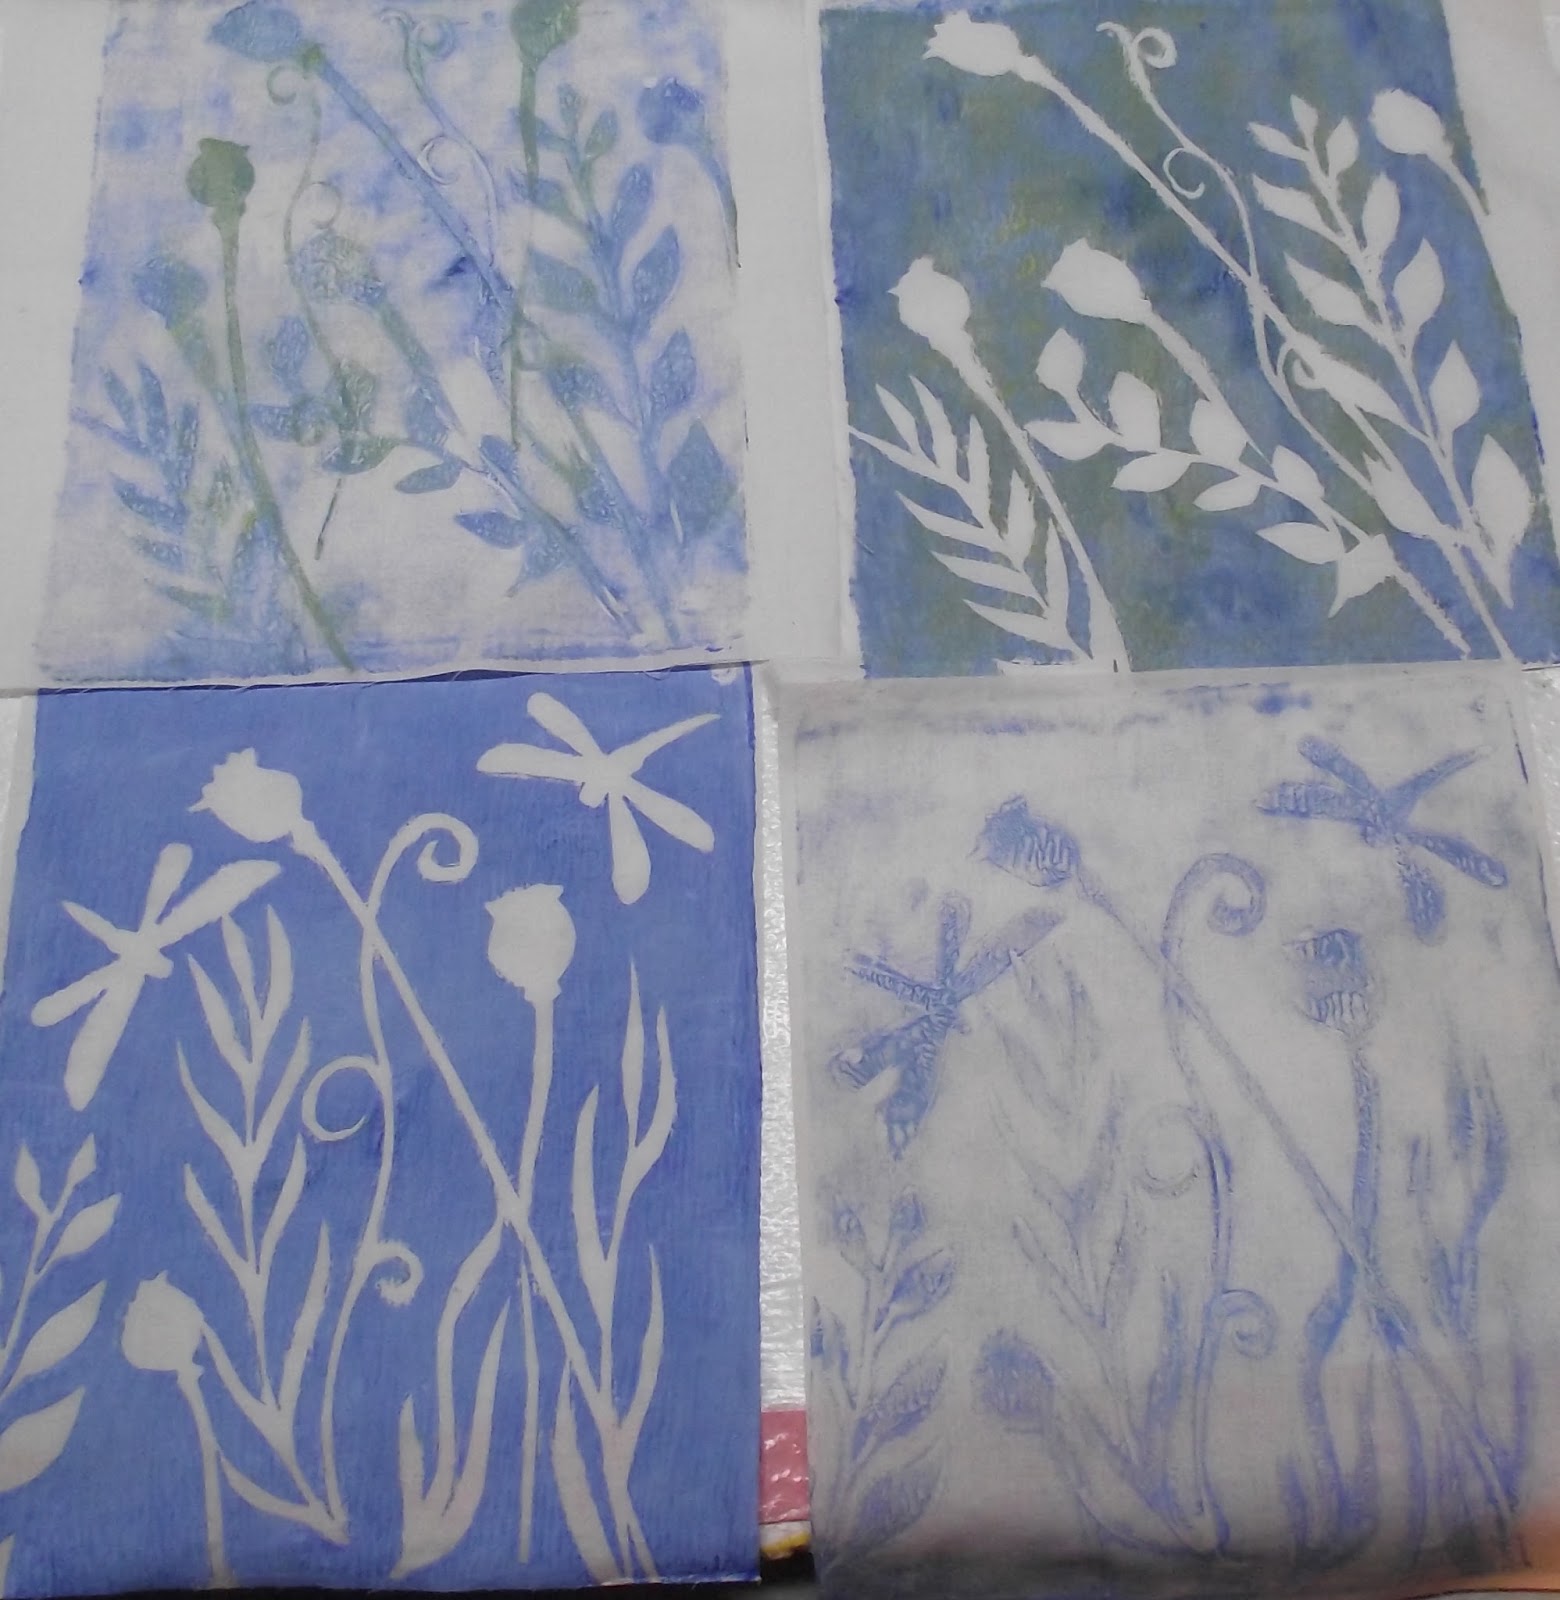
I cut a few more stencil/masks, some smaller leaves and some dragonflies. This is an arrangement of several stems together, with the dragonflies. I have posted this on Nina Marie's Off the Wall Friday please check out these other wonderful textile artists.
The first photo is a finished Gelli print, after I have added printing and stencils to it. The 2nd pic is how the Gelli print first turned out. I used several masks over a mauve paint, then laid down the fabric, it turned out very crisp and clear, but it needed more layers. I stenciled a darker mauve with a poppy pod, and extra foliage, the stencils worked well and the X-ray plastic was easy to wash the paint off of. I used several shades of paint a white pink and a darker one, with a sequin waste for a stencil, it added a lot of texture to the background, and some highlights to the pods and leaves. I think all my Gelli prints I made yesterday will get this multiple layer treatment.
These are the original prints, just using the masks. I made several different colorways, I used large jars of Versatex Textile paints, to see if I got a different feel than the cheap $1 acrylic bottles. I also added a colorless extender, hoping for more transparency, I think it helped a bit, it's not as opaque/chalky as the cheaper paints, but it covered well.
I think you can see the quality of the paints best, on the ghost prints. There was plenty of paint to get a good print, and transparent enough when I added a 2nd print, to show through. You can compare the ghost and the original side by side.
After making the ghost print, I also used the peeled off masks to make a print onto a clean piece of fabric. I think I like these the best, I can't wait to add more layers to them, but I've never liked how the white/muslin background looks. I may add a light wash of paint to the backgrounds. So I am very happy how these turned out, especially the layered mauve one, now to play with the others.
THIS IS ALSO MY 200TH POST! Thank you everyone for following.

Foto Friday 5 -Autumn Leaves

Here in Southern Oregon, we have had the most glorious autumn this year. Three weeks, going on four, with clear sunny days, cool nights, with heavy fog in the morning. It has been beautiful outdoor weather, in the low 70's, the trees are changing quickly now. We usually have to rake the leaves by Halloween, to keep the walks clear for the trick-or-treaters. Oregon mostly has Big Leaf Maple, and White Oak, the oaks just turn brown, but the maples turn a glowing yellow-gold. The leaves can be as big as 14" across and thickly carpet the ground. We add most of our leaves to top off the vegie garden, to keep the weeds down thru the winter and spring.
The neighborhood has many Japanese maples, and they turn a rich vibrant red. Native dogwood, and hybrid Japanese dogwoods have a deep red/bronze leaf color. We are patiently waiting for the robins to migrate through, and feast on the red pyracantha berries. We were just watching the kids up the street playing in the leaves in the street meridian, lots of sun shining & laughter.
I have made one art quilt with the Big Leaf maple. For my first International challenge "Currency Exchange" I used full size leaves to draw my pattern.
The quilt is 20" square, so you can see the size of the leaves. I used machine curved piecing and my hand dyed fabrics, with some Bali batiks, to make the leaves, and appliqued them to the background. The piece is titled "Standing on the Edge of Change." I don't think the color on the photo is very true, it's a lousy picture, you can't see the different fabrics I used in the leaves. This quilted wall hanging, in the exhibit, toured Japan, New Zealand, and the US, and was in the Tokyo International Show.

Tuesday, October 22, 2013

Cutting Stencils & Masks

I played around cutting some stencils and masks from plastics, to play with on my Gelli plate. I had cut the ferny leaf one a month ago, with an Exacto knife, the others I cut with a scissors. On the new Gelli Arts blog they had a video demo of a botanical print they made on their new 8" round gelatin plate. They had used stencil/masks from Green Pepper Press her "Fronds" sets are much more delicate and flowing then the ones I made, and you can order hers for purchase. I decided to cut some of my own stencil/mask combos. I used two types of template plastic, and exposed X-ray plastic, one of the plastics was very heavy and difficult to cut. I started with poppy pods, as I have always loved the way they look, I have already made one art quilt with pods, using freezer paper masks, and printing. Then I made some wavy, leafy things and grass types and curls.
The spiky holly leaves were the heavy plastic, and all the points got bent, but I was able to smooth it out. The dark plastic is the X-ray film, it is light weight and easy to cut, I used a white marking pencil to draw my designs free hand. If you are careful cutting in one stroke, you can use both the negative and the positive image. I have made masks before, and I put them all on the computer, so I could print out as many as I needed, but with the paper, I still have to cut them out each time. These plastic ones will be more permanent, and won't stick in the paint.
After I had cut an assortment, I got a full sheet of X-ray film to cut long poppy pods, and one long leaf stem. When they are all mixed together and arranged they will be awesome. I can't wait for a play day to try them with the Gelli plate and paints!

Sunday, October 20, 2013

Sewing Room Diagram

Goofing around in my sketch book, I decided to diagram my sewing room. The scan did not pickup the delicate colors of the colored pencil I used, the green cutting mat and the blue ironing board cover. My room is FULL, to the top! It is clear to the ceiling, on every wall. The fabric is stuffed so tight into the shelves, I cannot slide in another piece of fabric. There are also piles of boxes & bags of supplies, piled in the SE & NW corners of the room. It is organized but not neat, all the boxes are labeled clearly, colors are organized, and supplies are accessible. I have a large old steel desk in the middle of the room, my "Work Space" It has a cutting mat, rulers, and a basket of small supplies, brushes, pens, scissors, etc... In the corner is my sewing table, with my BIG tool box next to it, my thread racks, and to the left my ironing board. On the wall behind the sewing table is my design wall. It is not full height, but it is adequate for me, a small bookcase is in front of it. The other walls have 5 large metal shelves, FULL of fabric and shoe & pizza boxes of supplies and half finished projects. My County Fair and Show ribbons are above the door(no wasted space) and a cork board behind the door. It is a working room, not a show room, I have room for one person to sit opposite me at the table to work, and I mentor a young girl in textile arts. It does not have beautiful quilts on the wall, just projects on the design wall. It does not have a cozy sitting area, just an office chair to swivel between my sewing table and work table. It is my LIFE to be creative!
Several years ago, we put in new windows, so I got to cleanup the NE corner, and paint that section of wall. I also made new curtains, the old ones were so old they disintegrated in my hands. It really brightened up the room, you can also see some of the mess in the room. A messy person is a creative person, as I pull out paints, bits of lace, beads, and all the other embellishments, my mind combines them into a beautiful work of art. I can almost always find the things I am looking for, remember organized, but not neat.

Friday, October 18, 2013

Foto Friday 4 - Orange Harvest

Mother Nature loves orange in the Autumn. Bright leaves, sunflowers, pumpkins & gourds. Many quilters are afraid of orange, just like they don't like yellow. I'll admit I don't have as much orange in my stash as I have yellow, but I still use it, mostly for it's use as a contrast to blue. I use it for terra cotta flower planters, salmon in the stream, orange juice or an orange Popsicle, orange can be found in many flowers and birds, beetles and butterflies.
I have always loved carving Jack-o-lanterns, as a kid it was a family endevour, I still carve pumpkins as a Halloween lure to our doorstep. I love the traditional last minute search for a candle, and fitting the lid on just right, and to watch them glow in the dark on the front porch. I've also many times saved the seeds to eat. Just wash them a bit, and soak them overnight in a bowl with water and 1/2 cup of salt. Drain the next morning and spread on a cookie sheet, bake on low til they start to dry and turn lightly brown.
HAPPY HARVEST!

Saturday, October 12, 2013

Stash Saturday 3 - Threads

I have a lot of thread, just like every thing else, this is a set of nice cotton DMC threads in a plastic case, that I got from my Mom.
The wire baskets with some of my rayon spools, was a garage sale find. It holds the larger size spools, that they don't make racks for. The smaller Sulky spools, I could use up in one project, as I love to use rayon thread to free motion quilt, so now I buy bigger spools. I always say, if a picture is worth a 1000 words, then it is certainly worth a 1000 yards of thread. When I thread paint a photograph on fabric, I will often use 4 or 5 colors on one flower, 4 shades of green on the leaves, and 4 different blues on the sky background. Changing bobbin threads to match helps give a smooth line of color on the top.
My pride and joy is my huge thread rack that some nice man made for his wife. I got it for $5 at an estate sale. The bottom 1/3 is my specialty threads, metallics, holographic, and smaller spools of rayons. The middle third has my cheap poly and cotton threads, that I use for matching bobbins, I have a shoe box full of extras too. The top third is a lot of top stitching and buttonhole threads, for when I was sewing Teddy Bears, fine lace thread, and miscellaneous stuff. I also have a BIG box of embroidery floss, yarns and fibers. I also have a box of vintage rayon embroidery floss, it is so shiny and slippery. Threads are like your fabric palette, you need to have the right thread, as I almost never use a contrasting color.

Friday, October 11, 2013

Foto Friday 3 - Texture

Quilting by nature is a two dimensional structure, layers of fabric with a batting. By running quilting thread through the layers, quilters create texture. Hand quilting, and cotton batting, and many washings has given vintage quilts a soft wrinkled texture. Modern quilters are giving quilts texture with more than just quilting stitches. By layering organzas, silk, melted Tyvek and Lutrador, by doing fancy stitching with textural yarns, and needle felting, quilters strive for texture in their art work. Folding fabric flowers and making 3 dimensional objects, has taken quilts even further off the flat layer. 
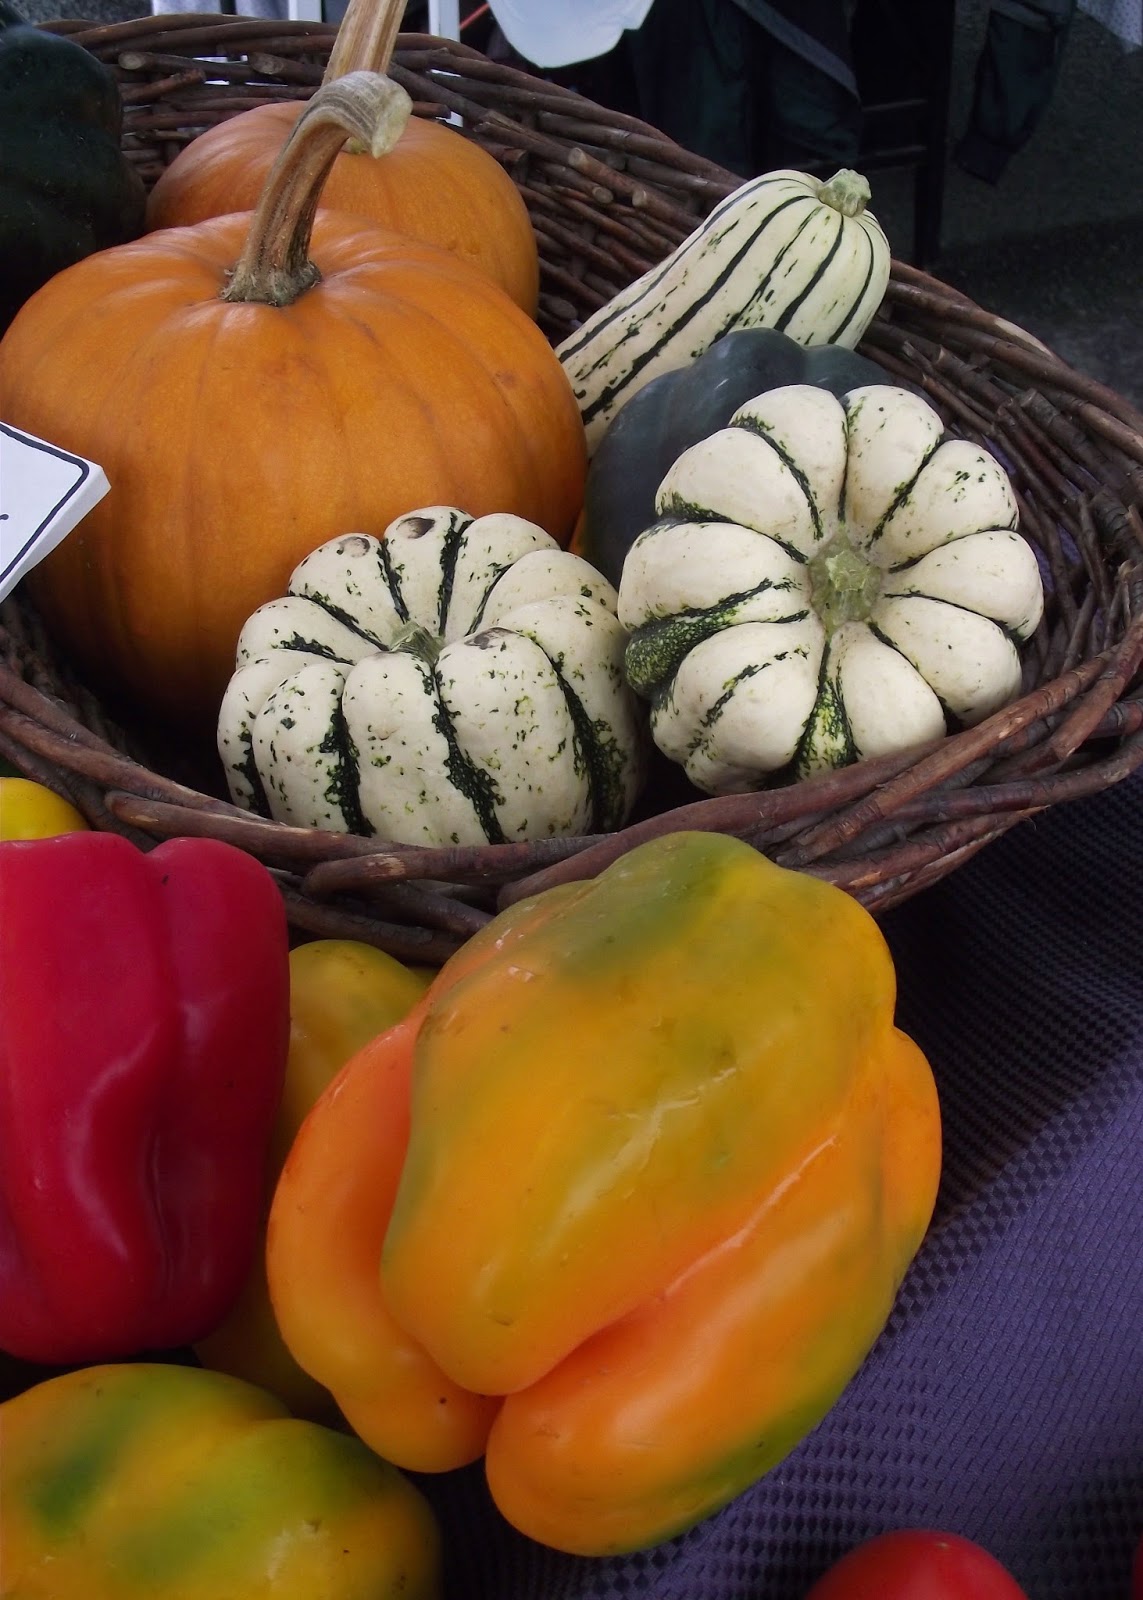
Use these texture photos to give you inspiration for your quilting stitches, folding or layering. Print them on fabric and use them for backgrounds, or as a main piece for your art, cut and piece them in different patterns. Recreate them in fabric with paint, dye, crayons, Shiva Oil Sticks, or screen prints or Linoleum block carving. What if you......
Try taking your own textural photo graphs to inspire you. A simple walk around the block will give you rock walls, metal sewer covers, leaf & grass textures, tree bark, gravel, fences, and many more. Open your eyes and look at things from a different viewpoint. Play and create texture in your artwork.
These are some of the textures I've created with needle felting, yarns and beading, on my piece titled "To Nurture and Protect II"

Sunday, October 6, 2013

Finished - "Leonardo's Sketchbook"

"Leonardo's Sketchbook" is finished! It's ready to go off on a world tour, of Japan, France & the U.S. I am VERY happy with the results. I did not do all the thread painting I had envisioned. I kept the quilting simple, and let the images speak for themselves. The applique at the bottom added objects to focus on the sketchbook idea, feather pen, brushes and pots of ink/paint. The sketchbook itself has a small sketch from the last supper. On the opposite page are "Leonardo's Sketchbook" and "AMVMMXIII" my initials and 2013 in Roman numerals. My initials make great roman numerals!
The last photo shows the quilting on the back of the quilt, the top 4" are covered by the sleeve, so you can't see the "Last Supper." Everyone keeps telling me the statue of David is Michelangelo's, but this is a sketch from Da Vinci. Maybe just a man's pose or maybe he copied the statue. Ancient Plagiarism!